 decorifusta Garden and patio decoration inspiration
Welcome to your ultimate guide for transforming a mundane bathroom into a stunning personal oasis! Weather you’re dealing with a tiny powder room or a spacious master bath, the right decor can make all the difference. In this listicle, we’ve curated 29 DIY bathroom decor ideas that are not only budget-friendly but also easy to execute. Each idea is designed to infuse your space with style and comfort, helping you create a serene retreat right at home. From clever association hacks to eye-catching aesthetics, prepare to be inspired by a variety of creative projects that will elevate your bathroom’s ambiance. Dive in and discover how simple updates can rejuvenate your sanctuary, showcasing your unique flair while making every visit to the bathroom a delightful experience!
Create a rustic Floating Shelf: Use reclaimed wood to craft a floating shelf that adds charm and provides storage for towels and decor
Transform an empty wall into a stylish storage solution by crafting a floating shelf using reclaimed wood. Sourcing wood from old barn doors or pallets can give your shelf a unique character, making it a perfect focal point in your bathroom. Start by measuring the desired length and height for your shelf, than carefully sand the wood to remove any rough edges. For a rustic look, you might want to leave some imperfections, as they add to the charm. Once your wood is prepped, apply a coat of wood stain or a protective finish to enhance its natural beauty while ensuring durability against bathroom humidity.
Installation is straightforward, requiring hidden brackets to achieve the floating affect. Once mounted, style the shelf with your favorite decor items and functional storage. Here are some ideas to consider placing on your new shelf:
- Fluffy towels for a spa-like feel
- Aloe vera or other low-maintenance plants
- Decorative jars filled with bath essentials
- Framed art or quotes to inspire
- Scented candles for relaxation
Upcycled Mason Jar Storage: Turn old mason jars into stylish storage for cotton balls, Q-tips, and other essentials by painting or decorating them
Transforming old mason jars into chic storage solutions is both an environmentally friendly choice and a way to add personal flair to your bathroom decor. Start by cleaning your jars thoroughly and removing any labels. Once they are clean, let your creativity run wild! You can paint them in soothing shades that match your bathroom’s color palette, or you can decorate them with washi tape, twine, or even decoupage techniques using decorative paper. Each jar can be designated for different essentials, such as:
- Cotton balls
- Q-tips
- Makeup brushes
- Jewelry
- Hair accessories
To elevate your upcycled storage game, consider incorporating some trendy decorations. use a clear sealant over your paint or paper for durability,ensuring the jars can withstand the bathroom’s humidity. For a rustic look, you might leave the glass unpainted and simply adorn it with natural elements like small pebbles or sand at the bottom. You can also group several jars together on a decorative tray for a cohesive display, making them a stylish yet functional centerpiece for your vanity. Check out this neat style guide:
| Style | Decoration Idea |
|---|---|
| Rustic | natural twine and burlap accents |
| Modern | Matte black spray paint and gold lettering |
| Vintage | pastel colors with lace trim |
| Boho | Colorful tassels and bead embellishments |
Relaxing Candle Arrangement: Curate a collection of candles in various sizes and scents to set a calming ambiance for your bath time rituals
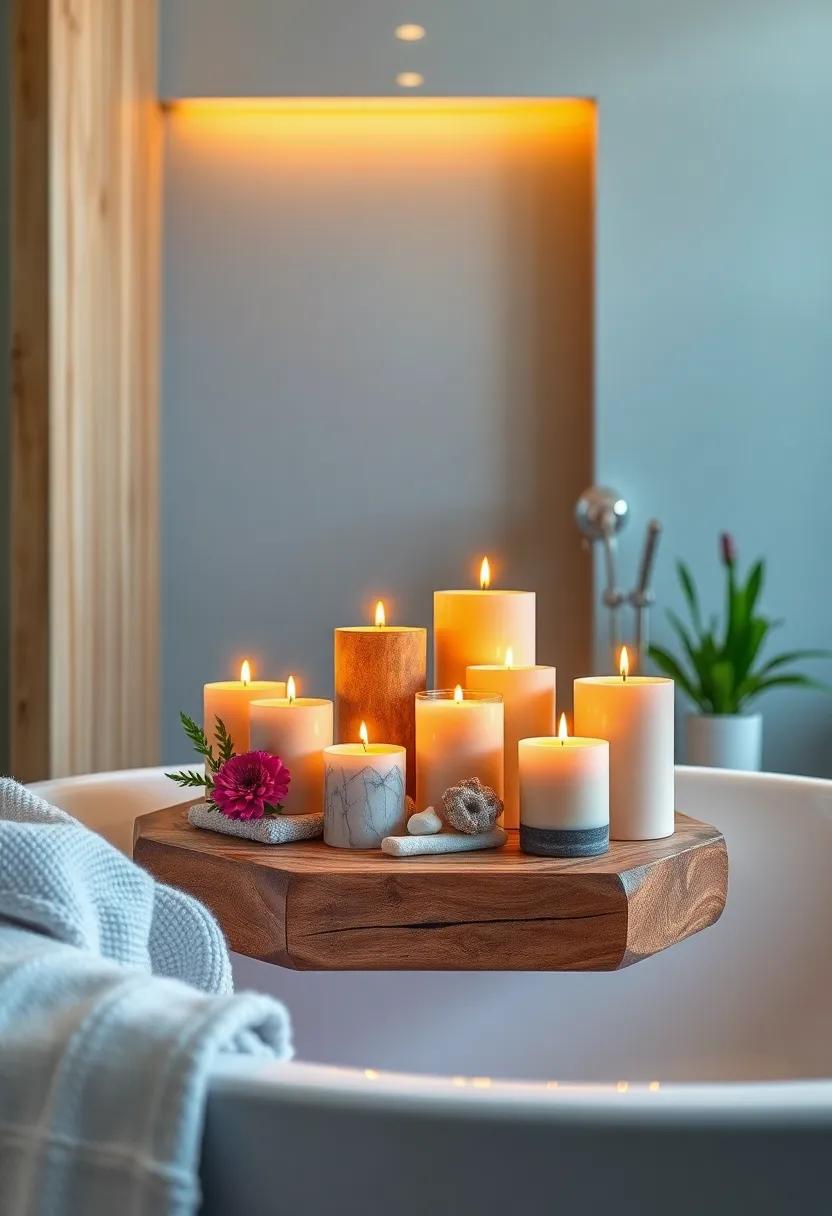
Transform your bath time into a serene escape by curating an exquisite candle arrangement that appeals to your senses. Start by selecting candles of varying heights and widths; this will create visual interest and dimension in your arrangement.Choose a mix of scented and unscented options to cater to personal preferences or mood changes. Consider classic fragrances like lavender,eucalyptus,or chamomile for a calming effect,and add a few citrus or fresh floral scents for an invigorating touch. Use decorative trays or mirrors as bases to enhance the ambiance while reflecting the gentle glow of your flickering candles.
To elevate the experience, incorporate natural elements such as pebbles, dried flowers, or greenery around the candles, providing a touch of nature that complements the soothing vibe. Ensure that the candles are placed at varying distances for a layered effect, and avoid clutter by keeping the arrangement simple yet elegant. for safety, consider using battery-operated candles that replicate the warm glow without the worry of an open flame. you can also create a themed display for different intentions—romantic evenings with soft reds and rose scents or a refreshing spa-like setup with whites and greens. Whichever route you take, this curated candle collection will undoubtedly enhance your relaxing rituals and transform your bathroom into an inviting personal oasis.
DIY Wooden Towel Ladder: Build a minimalist towel ladder from wooden dowels to hang your towels while adding a unique decorative element
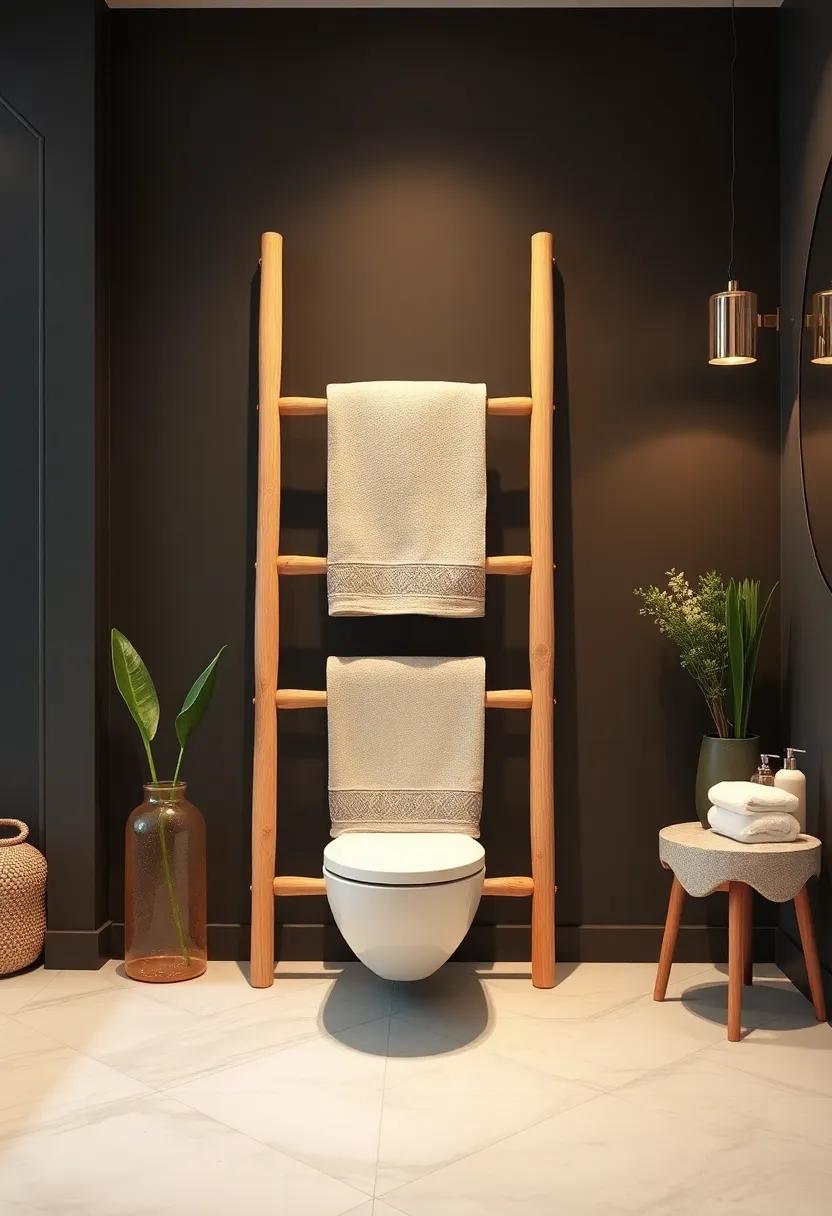
Creating a rustic and stylish towel ladder for your bathroom can be a rewarding project that enhances both functionality and aesthetics. Start by gathering wooden dowels of your preferred dimensions, along with some wood glue and sandpaper for a smooth finish. you’ll also need a saw to cut the dowels to your desired lengths.The construction process is straightforward: cut the dowels into equal lengths for the rungs and longer pieces for the sides. Arrange the rungs evenly along the side pieces and secure them with wood glue, ensuring a sturdy structure that will support your towels. Once assembled, give the entire ladder a good sanding to avoid any splinters, and consider staining or painting it to match your bathroom decor.
To add a touch of personality and flair to your wooden towel ladder, personalize it with various finish options or embellishments. You could opt for a natural wood finish for a timeless look,or choose a bold color that complements your bathroom’s theme. Enhancements like washi tape accents or stencils can introduce a fun pop of color or unique patterns. Arrange your towels by rolling them tightly for a neat appearance, or allow them to hang freely for a more casual aesthetic. This project not only organizes your towels but also serves as a striking decorative element that draws attention and elevates the overall vibe of your bathroom.
Botanical Wall Art: Frame pressed flowers or leaves to create stunning nature-inspired wall art that brings the outdoors into your bathroom
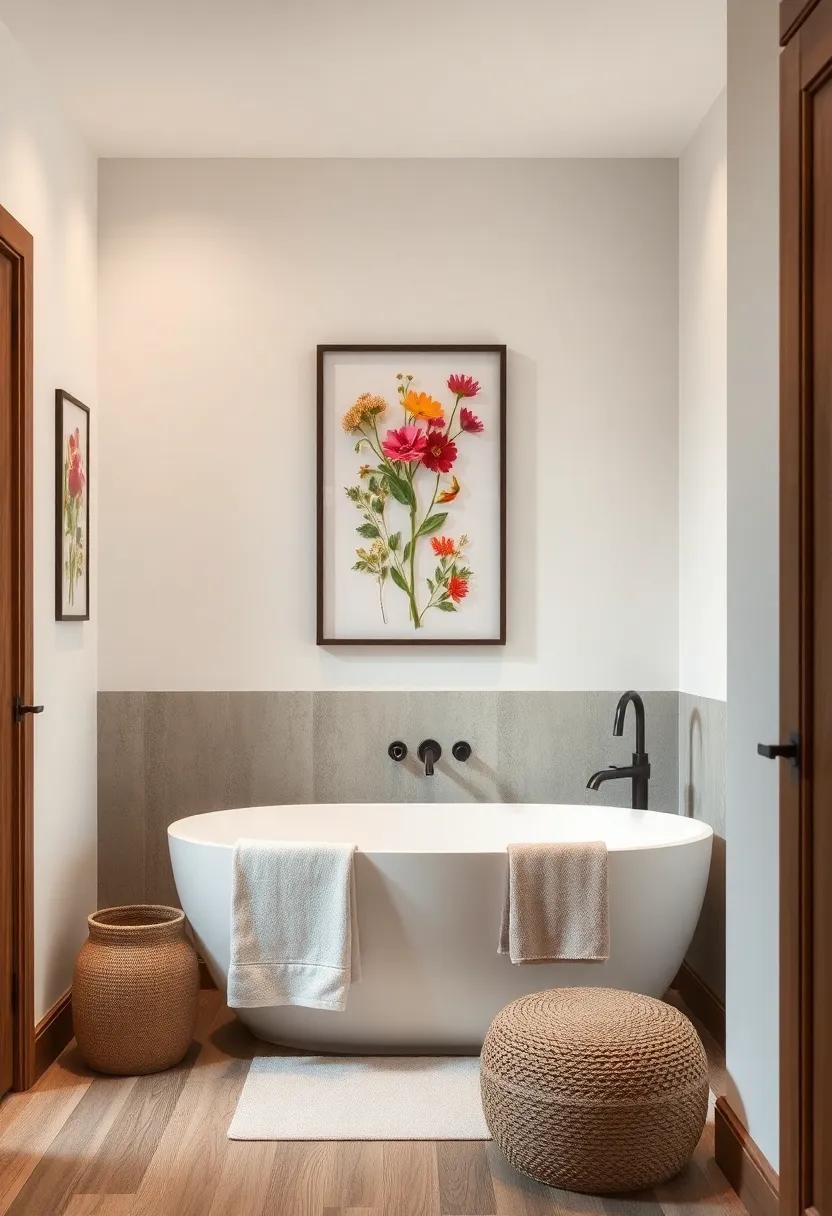
Transform your bathroom into a serene sanctuary by incorporating the beauty of nature with pressed flowers and leaves. This delightful DIY project allows you to capture the essence of the outdoors through unique botanical wall art that adds a soothing and organic touch to your space. Start by gathering vibrant florals or lush greenery from your garden or local market.Shop for suitable frames that match your bathroom decor—think wood for a rustic look or sleek metal for a modern approach.Once you’ve chosen your foliage, press them between sheets of parchment paper using a heavy book or a flower press for a couple of weeks. This step preserves the vivid colors and delicate textures of your finds.
After your flowers have dried, it’s time to showcase them! Arrange your pressed botanicals in the frames—consider layering different leaves and blooms for an eye-catching composition. You can even add a touch of elegance with a backdrop of pastel watercolor paper or natural linen fabric. Hang your framed art in a cluster on one wall, or create a single statement piece above your vanity or bathing area.Not only does this project celebrate the beauty of nature, but it also brings a personalized, calming aesthetic to your bathroom that invites relaxation and rejuvenation.
colorful Shower Curtain: Sew or paint your own shower curtain with bold patterns or colors that reflect your personal style and energize the space
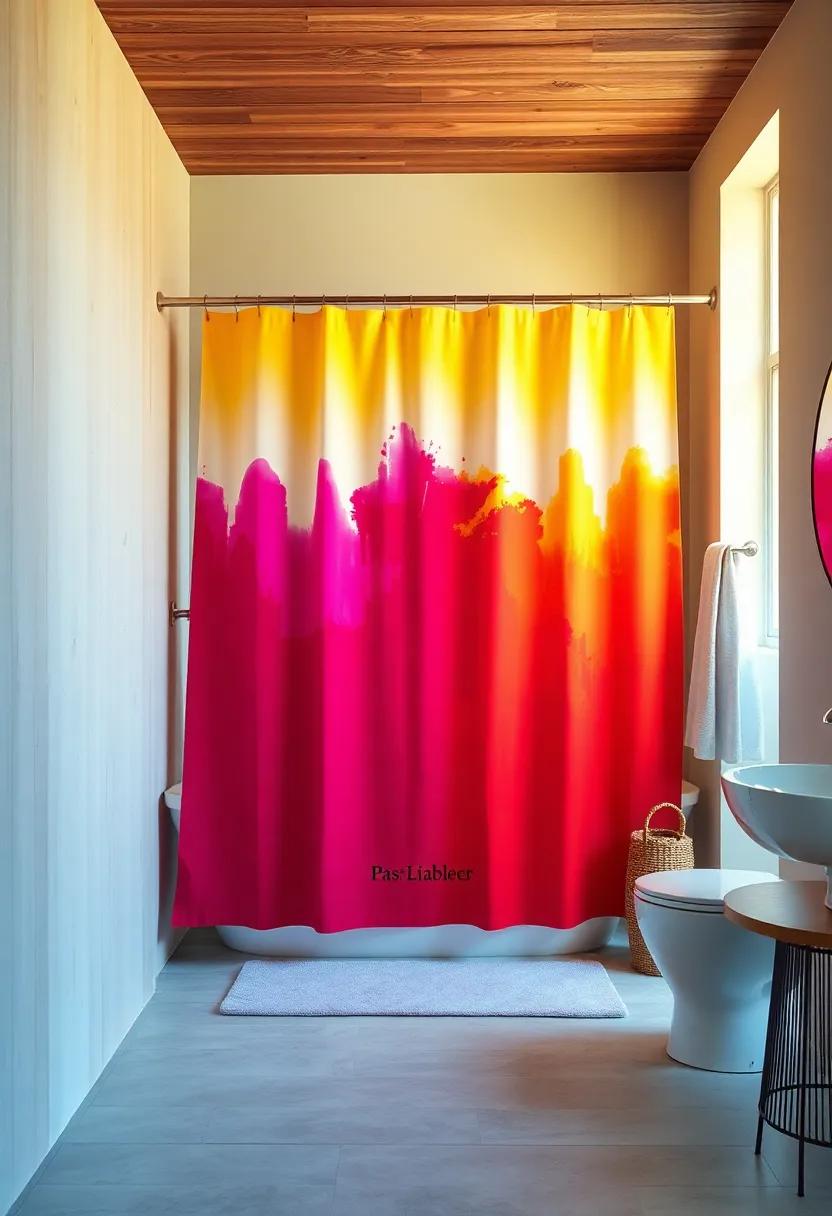
Transforming your bathroom starts with the little details, and nothing makes a statement quite like a colorful shower curtain. Unleash your creativity by either sewing your own from vibrant fabric or using fabric paint to create bold patterns that resonate with your personal style. Imagine a shower curtain adorned with geometric shapes, floral prints, or abstract art that injects energy and personality into your space. Choose color palettes that harmonize with other elements in your bathroom, ensuring a cohesive look that feels both refreshing and inviting.
Whether you opt for sewing or painting, the process can be a fulfilling DIY adventure. Consider these tips for your project:
- Fabric Choice: Select materials that are not only durable but also resistant to moisture.
- Color Impact: Bright colors can energize while softer tones can promote relaxation.
- Stencils & patterns: Use stencils for precision or freehand for a more unique, whimsical touch.
- Finishing Touches: Don’t forget to add embellishments like pom-poms or tassels for added flair!
Decorative Bath Mat: craft a plush bath mat from soft, recycled fabric strips for a touch of comfort and texture beneath your feet
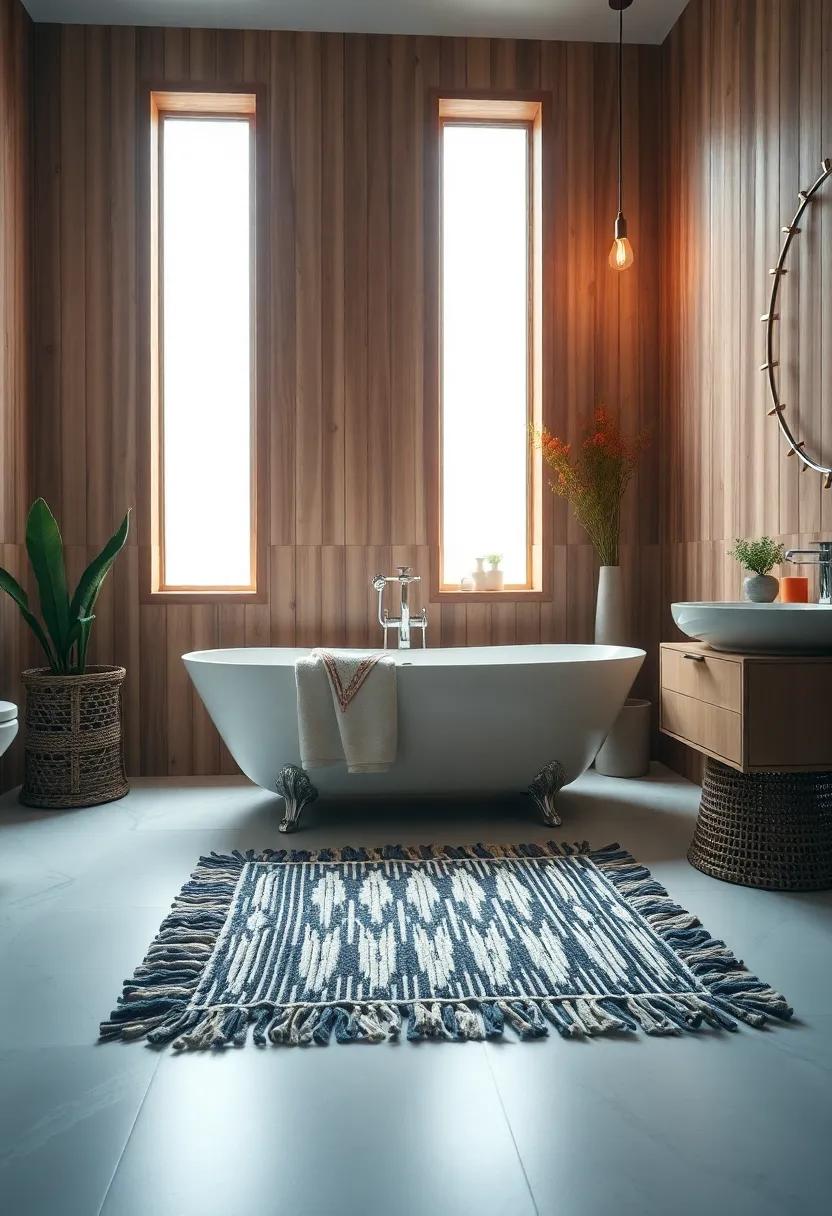
Revamp your bathroom floor with a cozy and eye-catching bath mat crafted from soft, recycled fabric strips. This fun DIY project not only adds a splash of color and texture to your space but also helps reduce waste by repurposing old textiles. Start by gathering a variety of fabric strips—think old T-shirts, towels, or even leftover fabric from other projects. To create your mat, simply braid or knot the strips together, forming a thick, plush texture that feels delightful underfoot. You can either sew the strips into a rug shape or tie them directly onto a non-slip backing for added durability.
For a unique touch, consider the following tips:
- Color Palette: Choose strips in complementary colors to match your bathroom’s theme.
- Size Variation: Make smaller mats for different areas, like in front of the sink or tub, for a cohesive look.
- Patterns & Textures: Experiment by adding different fabric textures—like using terrycloth for softness or cotton for a light touch—to create visual interest.
Be sure to finish the edges to prevent fraying and maintain the longevity of your bath mat.Enjoy stepping onto this delightful piece of eco-friendly decor as part of your relaxing bathroom retreat.
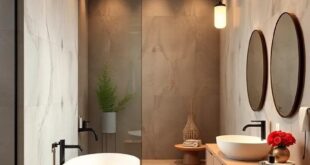
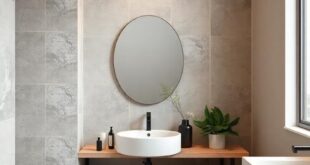
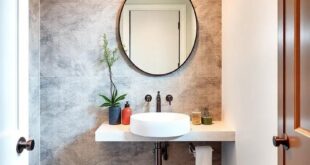
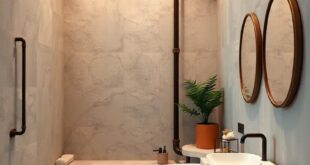
Vintage Mirror Makeover: Revamp an old mirror with paint or new hardware to create a statement piece that enhances light and space
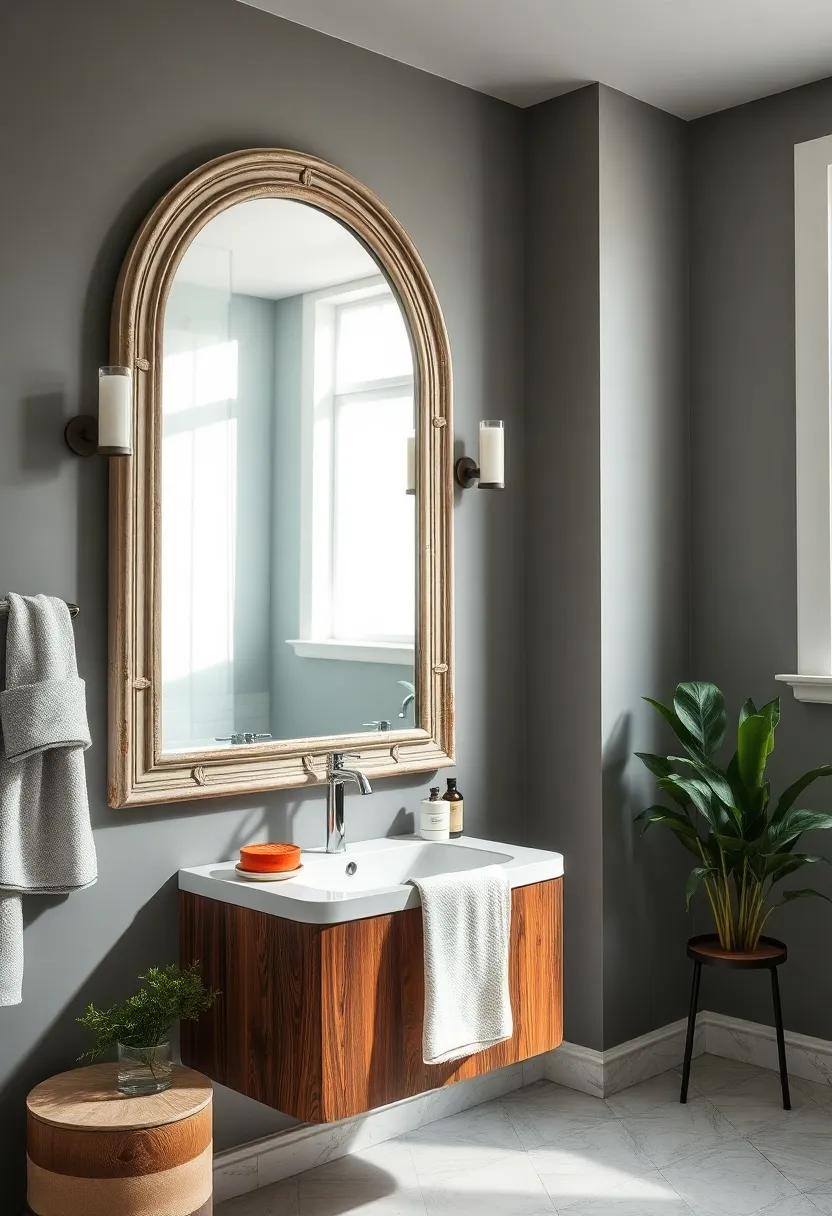
Transforming a vintage mirror is an exciting way to add character and charm to your bathroom. Start by choosing bold colors that resonate with your overall theme. for instance, a glossy teal or a soft blush can create a stunning contrast against neutral walls. Use chalk paint for an effortless matte finish that holds texture beautifully. before painting, ensure you sand down the surface to help the new paint adhere properly, and consider adding multiple coats for a vibrant pop. With a little patience, your once-forgotten mirror can become an eye-catching focal point that enhances natural light while also expanding the visual space of your bathroom.
If you prefer a less colorful approach, consider updating the mirror’s hardware rather. Replacing old knobs or hooks with modern or vintage-inspired options can completely change the mirror’s appearance without a full paint job. Look for ornate handles or sleek metal accents to bring a fresh look to your piece. Additionally, attaching a decorative frame around the mirror can further elevate its presence in the room, making it feel luxurious and intentional. Mixing styles can breathe new life into your vintage find, creating a unique statement piece that reflects your personal aesthetic.
DIY Succulent Wall Planter: Create a living wall by building a wooden planter box for succulents, bringing a fresh touch of greenery to your bathroom
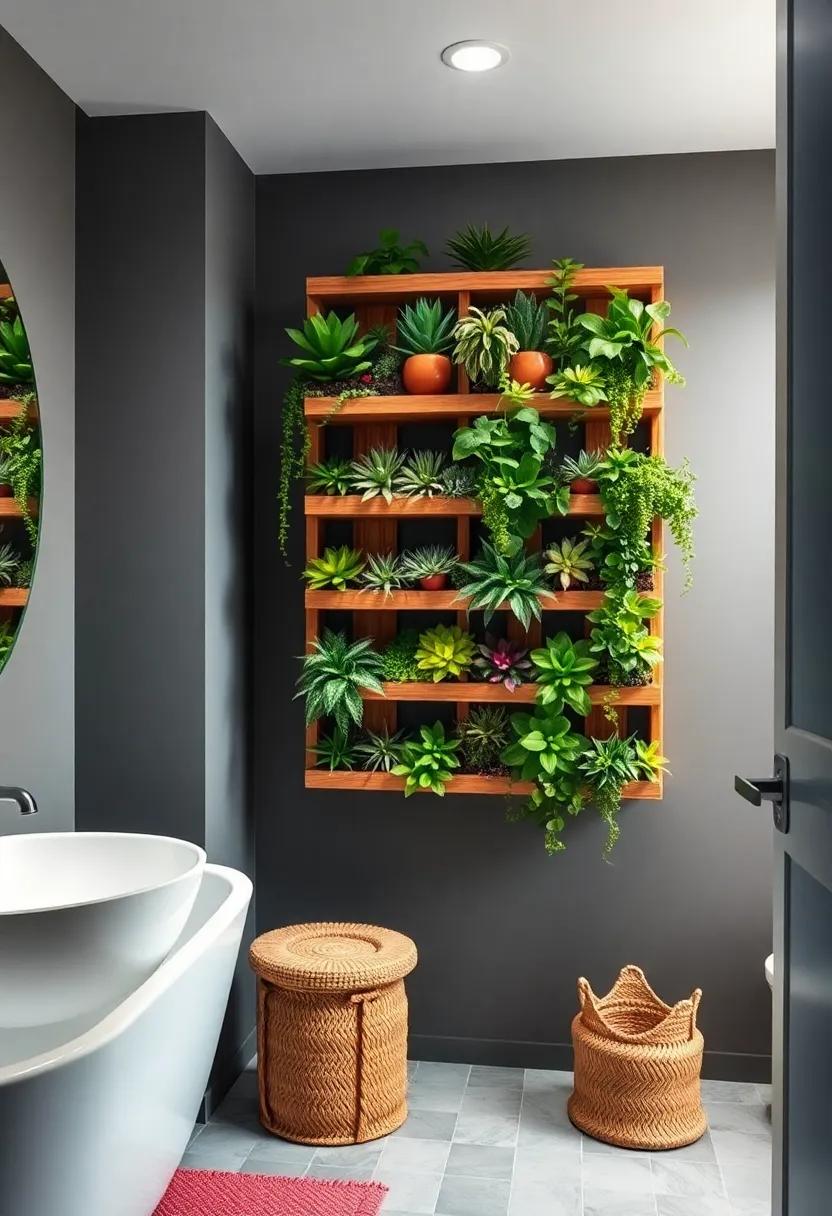
Transforming your bathroom into a verdant retreat is easier than you might think! Start by selecting a wooden planter box that suits the dimensions of your wall. You can create this from reclaimed wood for a rustic look, or opt for a sleek, modern finish to complement your existing decor. Once your planter is ready, fill it with a selection of hardy succulents. Their low maintenance nature makes them ideal for the bathroom environment, where humidity helps keep them thriving.Arrange them in various heights and textures for an eye-catching display that draws the eye upward.
To bring your living wall to life, secure the planter firmly on the wall using heavy-duty brackets, ensuring it can support the weight of the soil and plants. You might also want to line the bottom of the planter with landscape fabric to allow for proper drainage while keeping the soil in place. Here’s a quick checklist of materials you’ll need:
- wooden boards: For building your planter
- Succulent Soil: Well-draining mix
- Variety of Succulents: Choose different shapes and colors
- Heavy-Duty Brackets: for wall mounting
- Landscape fabric: To line the bottom
custom Framed Inspirational Quotes: Print or write your favorite quotes, frame them, and display them to inspire positivity every day
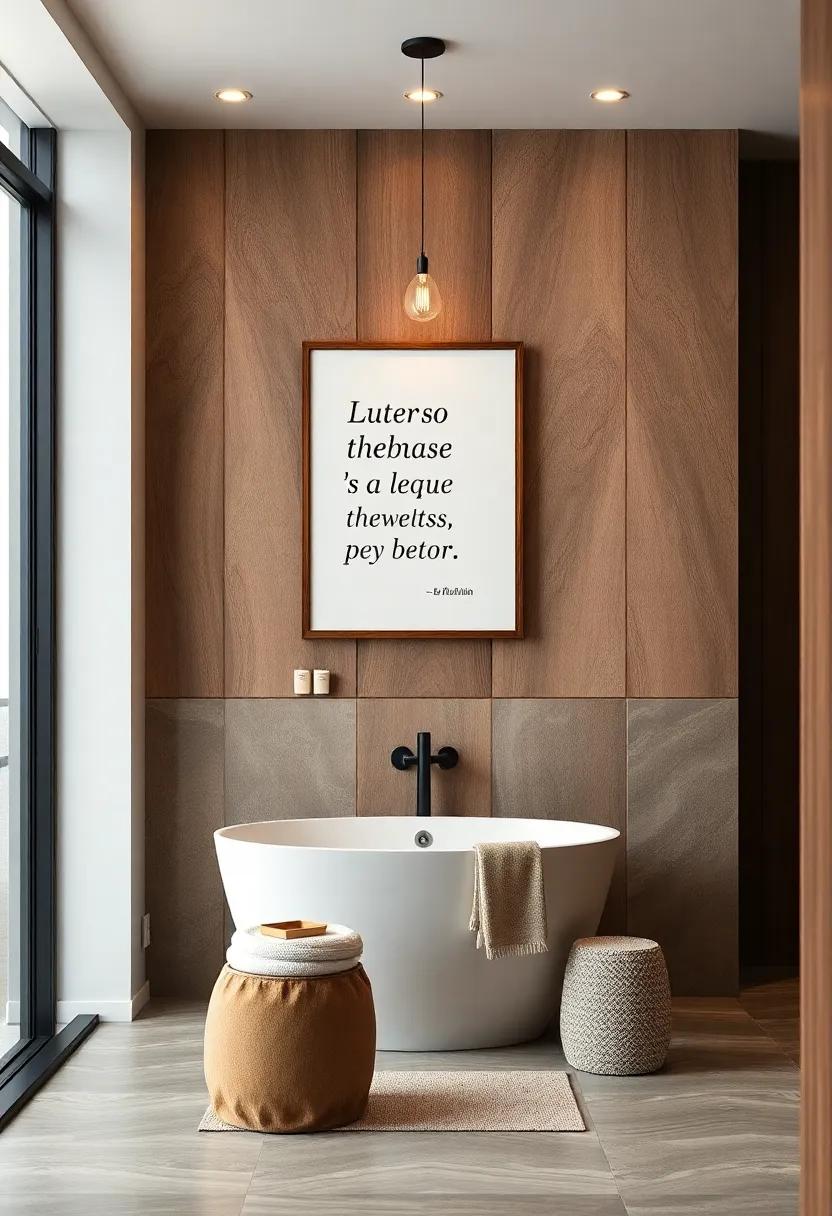
Transform your bathroom into a haven of inspiration by incorporating custom-framed quotes that resonate with your personal journey. Begin by selecting a few motivational phrases or affirmations that uplift your spirit. You can opt for well-known quotes from authors,philosophers,or even your favorite song lyrics. Print them in a stylish font or handwrite them for a more personal touch. Choose frames that complement your bathroom’s decor,whether it be sleek,modern designs or rustic wooden finishes.
Display your framed quotes on floating shelves or create a dedicated wall gallery. Consider the following ideas to enhance the visual appeal:
- Select a color palette: Match the frames to your bathroom’s color scheme for a cohesive look.
- Mix frame styles: Create visual interest by using a combination of sizes and styles.
- Incorporate nature: Surround the framed quotes with small plants or succulents for added vitality.
- change with the seasons: Swap quotes periodically to keep the inspiration fresh and relevant.
Chalkboard Paint Accent Wall: Transform part of your bathroom wall with chalkboard paint, giving you a space to jot down notes or inspirational messages
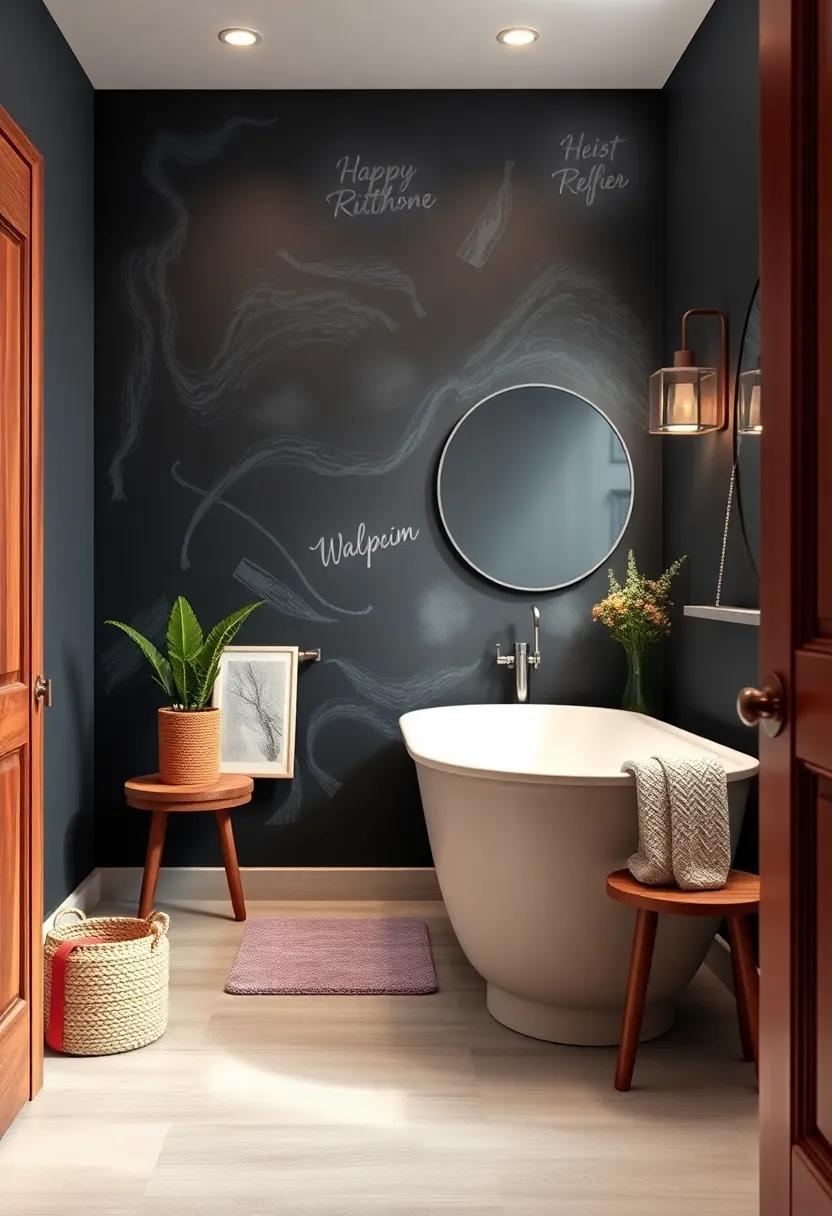
Imagine stepping into your bathroom and being greeted by a stylish and functional chalkboard paint accent wall! This innovative approach not only adds a trendy element to your decor but also provides a practical space for creativity. Whether you’re leaving sweet notes for your partner, jotting down reminders for your next grocery run, or showcasing your latest inspirational quote, a chalkboard wall serves as both a canvas and a conversation starter. Think about pairing it with vibrant decor elements, such as colorful towels or bright accessories, to create a fun contrast that elevates your bathroom’s overall look.
In choosing the perfect wall for your chalkboard masterpiece, consider areas that are visible yet functional, like the space behind a door or beside the mirror. To achieve a polished finish,prepare the wall by applying a solid base coat before the chalkboard paint,ensuring long-lasting results. You can add personalization by painting with different colors or creating an intriguing pattern. Once finished, keep a variety of chalk colors handy to switch up your messages and designs! Embrace the versatility of a chalkboard wall and transform your bathroom into a delightful zone of inspiration.
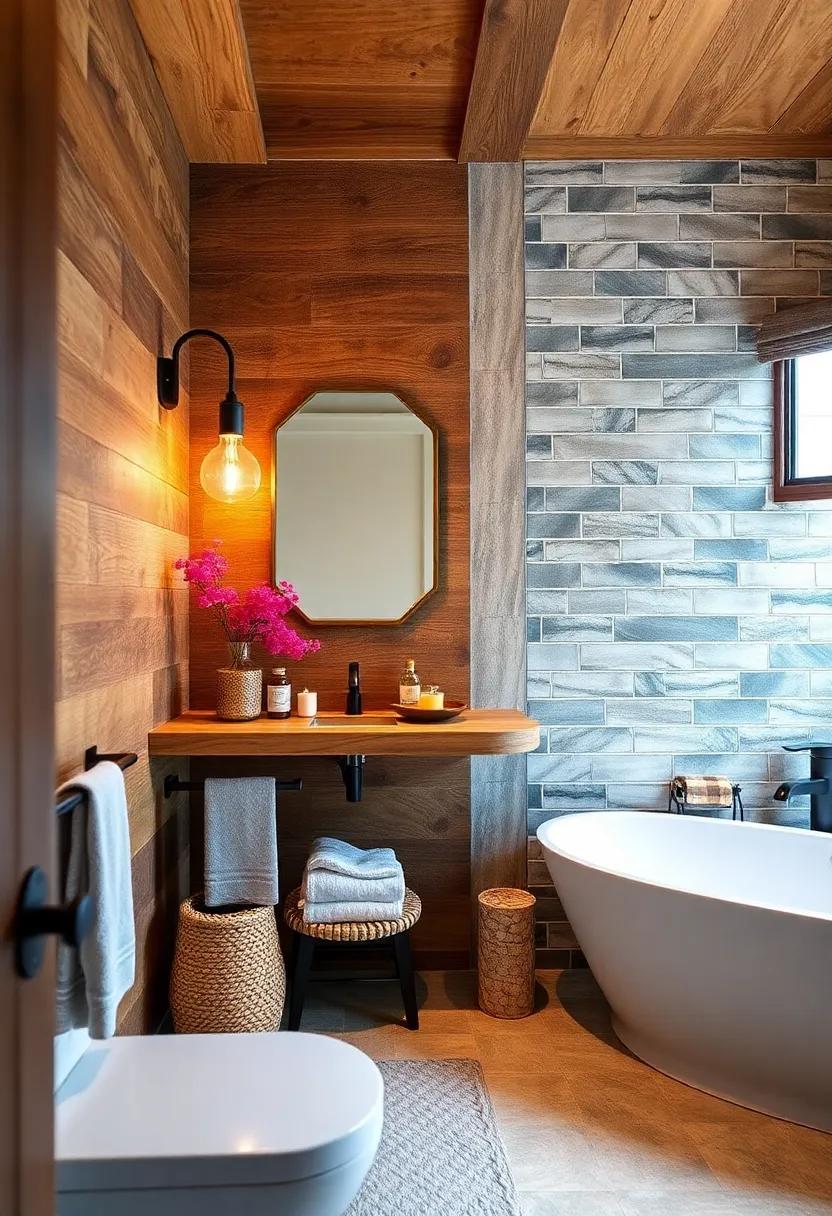
Reclaimed Wood Barn Door: Add a rustic touch by installing a sliding barn door to your bathroom entrance for both style and functionality
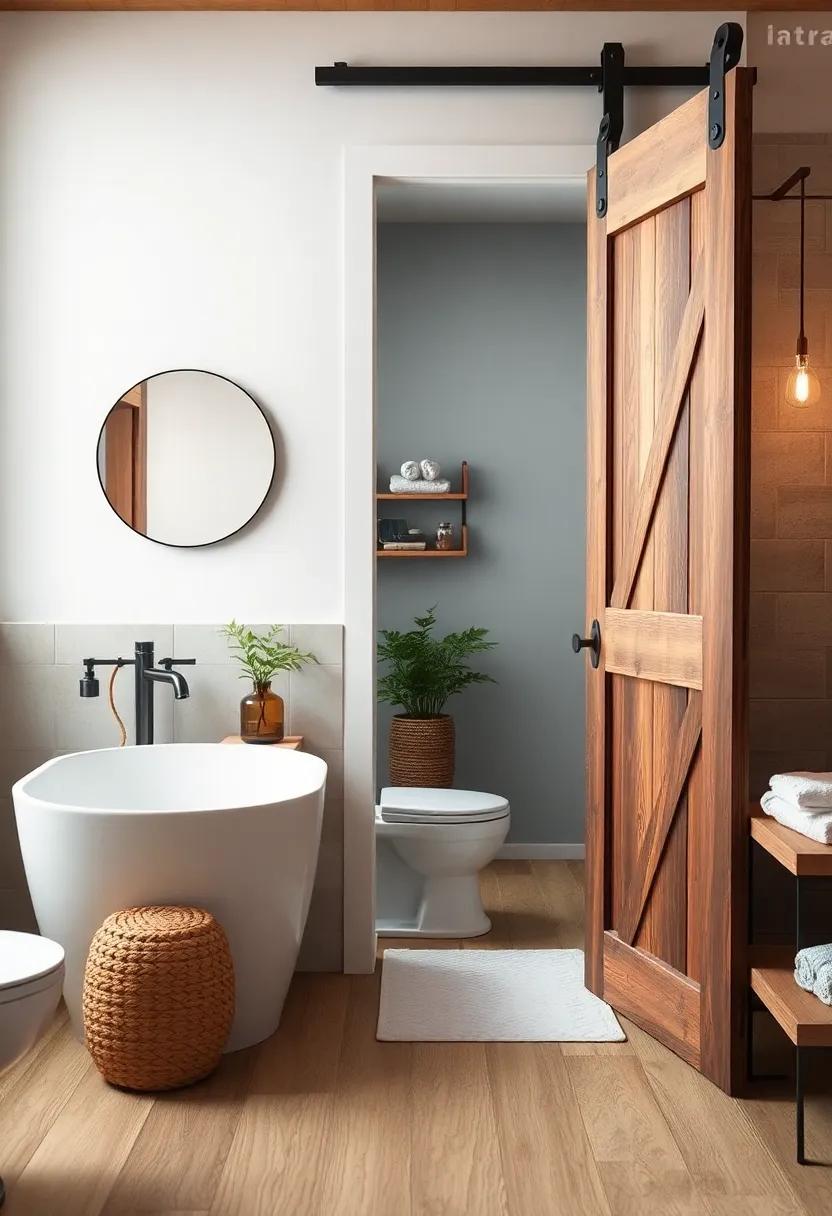
transform your bathroom entrance with a stunning reclaimed wood barn door that seamlessly blends rustic charm and modern utility.The warm, earthy tones of the reclaimed wood add a welcoming vibe and create a focal point in your space. not only does a sliding barn door save valuable floor space by eliminating the need for swing clearance, but it also brings an innovative design element that can elevate the overall aesthetic of your bathroom. Whether you opt for a vintage finish or a more polished look, the unique grain patterns in reclaimed wood guarantee that your barn door will be a one-of-a-kind feature.
When designing your barn door, consider the following elements to enhance both style and functionality:
- Hardware Choice: Select robust sliding mechanisms like black wrought iron or brushed nickel to complement the wood while ensuring durability.
- Custom Staining: Customize the wood’s finish with stains that match your existing decor, whether it be light, medium, or dark hues.
- Decorative Accents: Add small details such as handles or hinges that accentuate the rustic theme while providing ease of use.
For a seamless look, consider using a consistent color palette throughout your bathroom.Here’s a simple table to visualize how complementary colors can make your barn door pop:
| Color | Effect |
|---|---|
| Soft White | Brightens space and enhances the wood grain. |
| Slate Gray | Provides a modern contrast to rustic wood. |
| Muted Green | Brings a serene, nature-inspired feel. |
Personalized Soap Dispenser: Upcycle a simple glass bottle into a chic soap dispenser by adding decorative elements and a pump lid
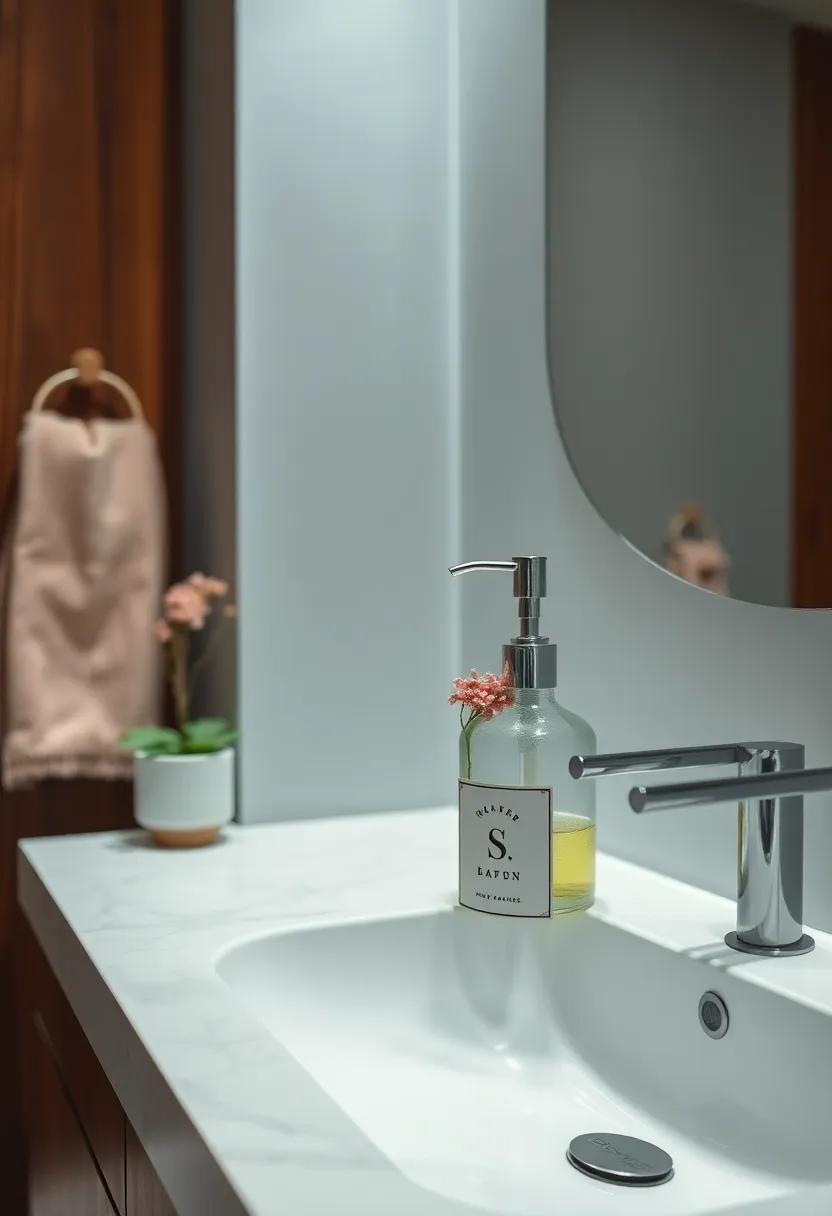
Transforming an ordinary glass bottle into a chic soap dispenser is a splendid way to add a personal touch to your bathroom décor. Start by selecting a glass bottle that resonates with your style—this could be an old beverage bottle, a vintage jar, or any unique glass container you have on hand. Clean it thoroughly to remove any residue or labels, preparing it for a makeover. Next, consider adding decorative elements that reflect your personality:
- Paint—Spray paint in a stylish color or use acrylic paint to create custom designs.
- Twine or Jute—Wrap it around the neck for a rustic touch.
- Stickers or stencils—apply motivational quotes or patterns for a fun vibe.
Once you’ve embellished your bottle, the final touch is adding a pump lid. You can find these at craft stores or repurpose one from an old dispenser.For functionality, ensure the pump fits securely and is easy to use. If desired,consider this simple table for a guide on common paint options:
| Paint Type | Finish | Best For |
|---|---|---|
| Acrylic | Matte or Glossy | Creative Designs |
| Spray Paint | Glossy | Solid Colors |
| Chalk Paint | Matte | Rustic Vintage Look |
With your personalized soap dispenser in place,you’ll not only enhance the aesthetics of your bathroom but also keep your soap handy in an eco-friendly way. This DIY project not only recycles materials but also adds a lovely charm to your space.
Natural Stone Accent Tiles: Incorporate natural stone tiles into your bathroom countertop or backsplash to infuse organic elegance
Transform your bathroom into a serene retreat by incorporating natural stone accent tiles into key areas. Picture a stylish marble backsplash behind your sink,gleaming under warm lighting,or a granite countertop offering rich hues and unique patterns that breathe life into your daily routine. Both options not only enhance aesthetics but also showcase the inherent beauty of nature, creating a harmonious balance between functionality and organic elegance.
Consider mixing and matching different types of stones for added depth and texture.A slate accent wall might pair beautifully with a soapstone vanity, or travertine tiles could border a sleek quartz surface. Choose natural tones like earthy browns,soft whites,and muted blues to evoke the calm of a spa-like experience.To spark your creativity, make use of the following inspiring style ideas:
- Patterned layouts – Use geometric designs to make a bold statement.
- Textured finishes - Opt for honed or leathered stone for a tactile experience.
- Accent bands – Introduce a strip of contrasting stone for a complex look.
Hand-Painted sink: Get creative by painting the exterior of your sink or creating designs around the basin for a unique focal point
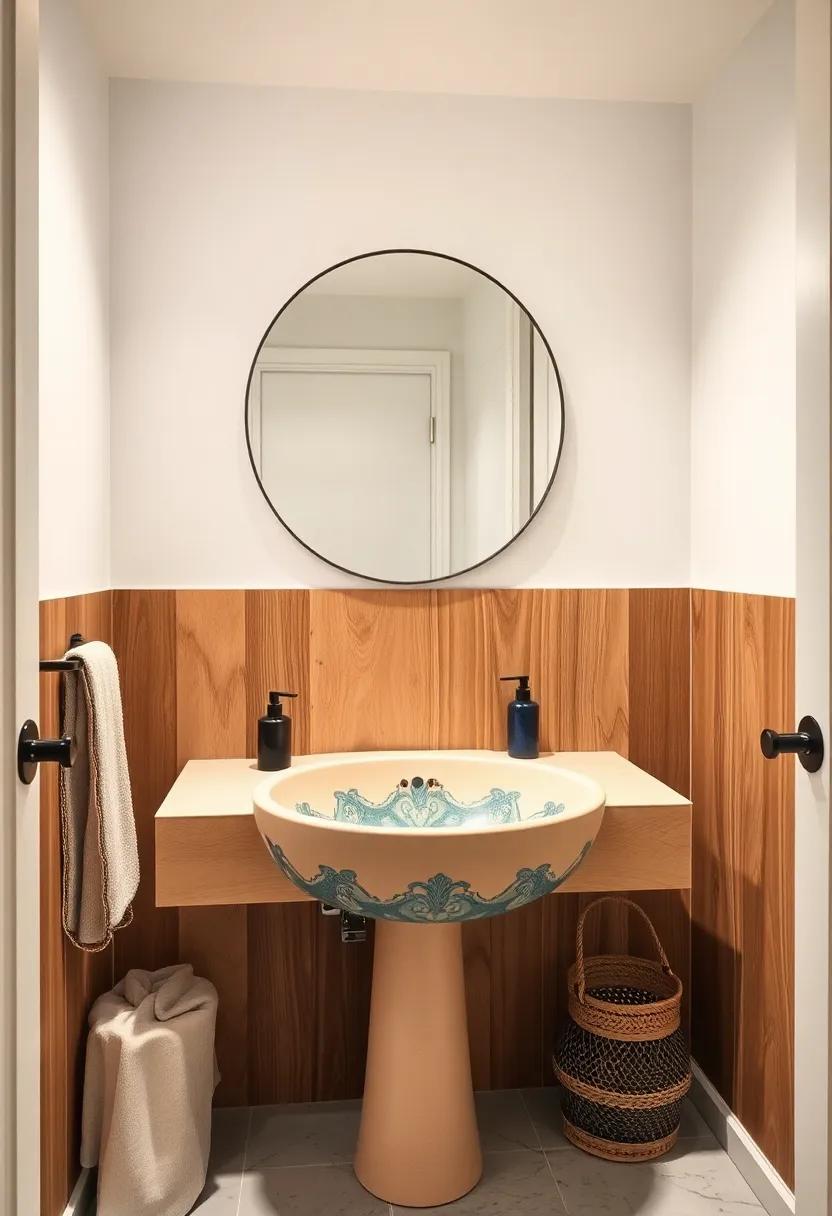
Transform your standard bathroom sink into a work of art by adding a personal touch with hand-painted designs. Focus on the exterior of the sink or create stunning motifs around the basin to draw the eye and elevate the entire space. Here are some ideas to inspire your creativity:
- Floral Patterns: Capture the essence of nature with vibrant blooms that wrap around the sink, adding a touch of freshness.
- geometric Designs: Embrace modernity by painting bold shapes that create a visually striking contrast against the sink’s material.
- Ombre Effects: Gradually blend colors for a soft, dreamy look that can complement any bathroom color palette.
- Inspirational Quotes: Personalize your space with hand-painted motivational messages that spark joy every time you use the sink.
- Whimsical Characters: bring a playful element to your bathroom with charming cartoons or mythical creatures that tell a story.
Before diving into your art project, consider the type of paint and sealant to use, ensuring durability against moisture and daily wear. You could even organize a small painting party, inviting friends to contribute their artistic flair to the sink’s design. To help you plan your creative endeavor, here’s a simple table of supplies you might need:
| Supplies | Purpose |
|---|---|
| Paint Brushes | For detailed painting and broad strokes. |
| Acrylic Paint | Water-resistant and available in various colors. |
| Painter’s Tape | To achieve clean lines and protect edges. |
| Sealant | To protect your artwork from water damage. |
| Drop Cloth | To keep surfaces safe from splashes and spills. |
Fabric-Covered Storage Boxes: Cover old boxes with fabric to create customized storage solutions that help keep your bathroom organized and visually appealing
Transforming old boxes into chic, fabric-covered storage solutions can elevate your bathroom’s organization and aesthetic. Choose a fabric that complements your bathroom’s color scheme—think soft pastels for a calming vibe or vibrant patterns for a bold statement. Follow these simple steps to give your storage a stylish makeover:
- Gather Materials: Old boxes,fabric,scissors,adhesive,and a measuring tape.
- Measure & Cut: Measure your boxes and cut the fabric, leaving a few extra inches for folding over the edges.
- Adhere Fabric: Use a strong adhesive to attach the fabric to the boxes. Smooth out any wrinkles for a polished look.
- Customize: Add embellishments like ribbons, labels, or decorative buttons to personalize your storage even further.
These customized storage boxes can serve multiple purposes in your bathroom.Use them to store essentials like towels, toiletries, or miscellaneous items that often clutter your countertop. Their tailored appearance not only enhances organization but also adds to the decor, making your bathroom feel more like a personal retreat. Consider creating a small table to visualize your storage options more clearly:
| Box Type | Ideal Storage | Suggested Fabric |
|---|---|---|
| towel box | hand towels & washcloths | Soft cotton or linen |
| Toiletry Box | Skincare & makeup products | Water-resistant canvas |
| Miscellaneous Box | First aid supplies & overflow items | Patterned polyester |
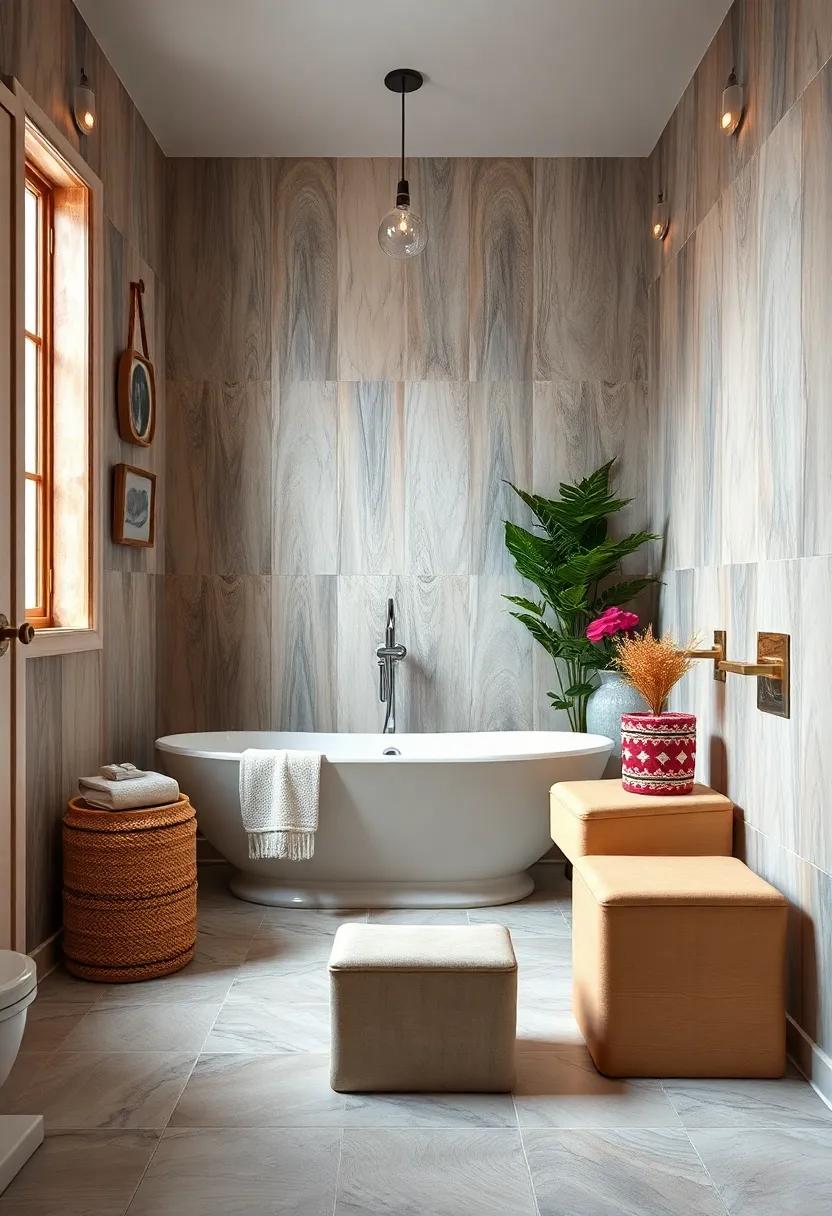
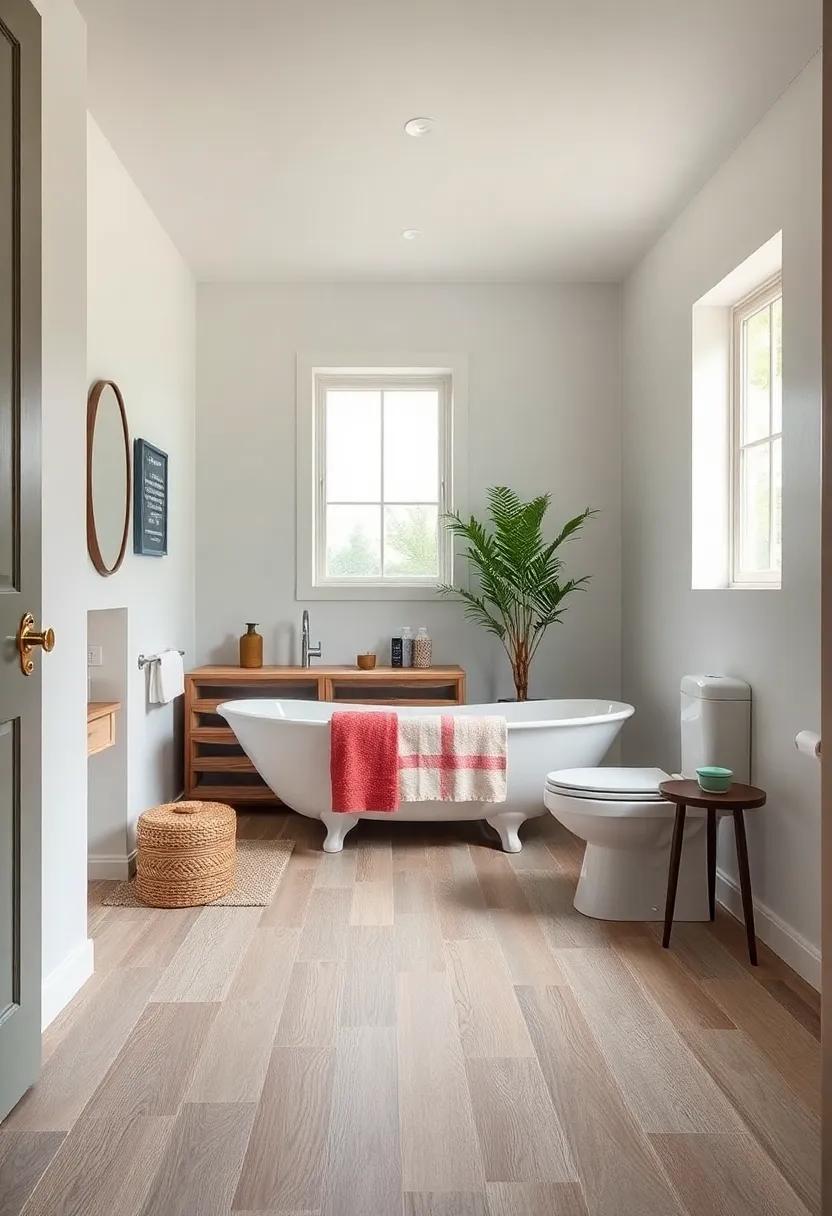
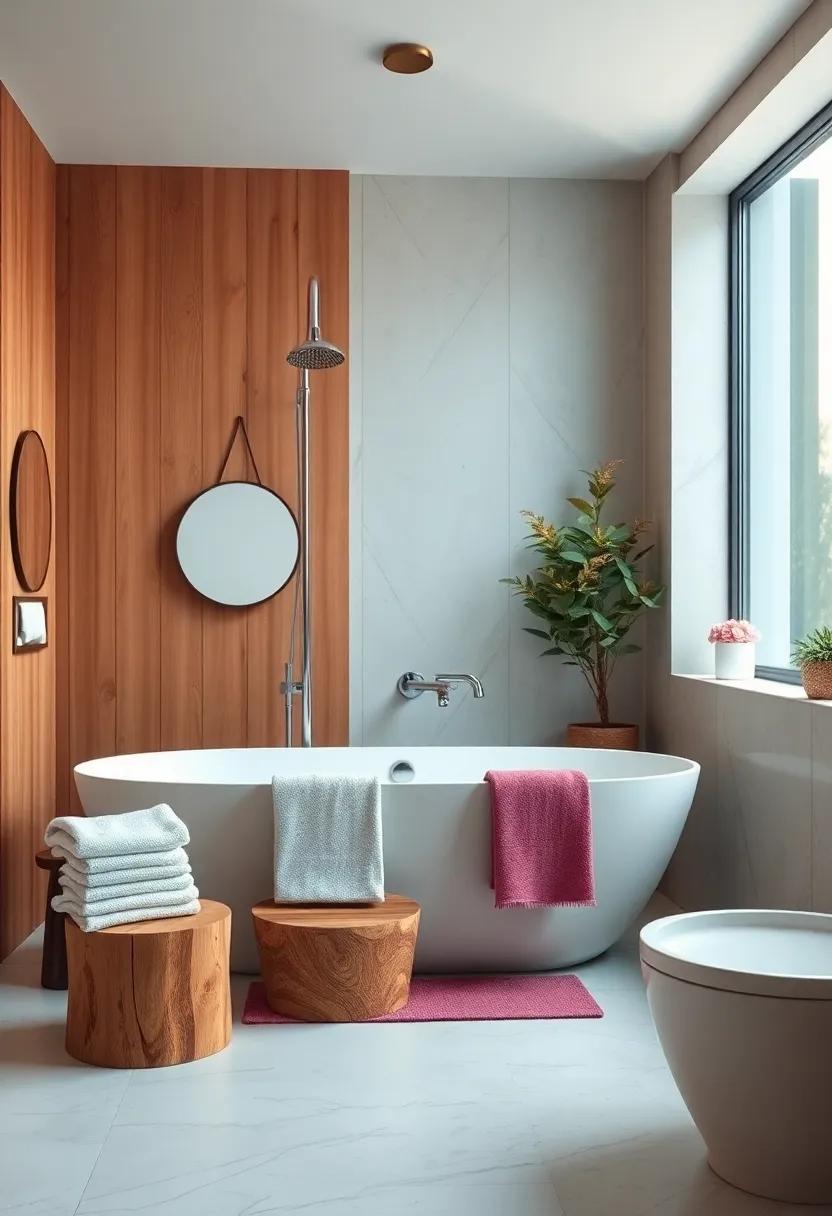
Cozy Corner Seating: Designate a cozy corner with a chic chair and a small side table for a relaxing reading nook in your bathroom
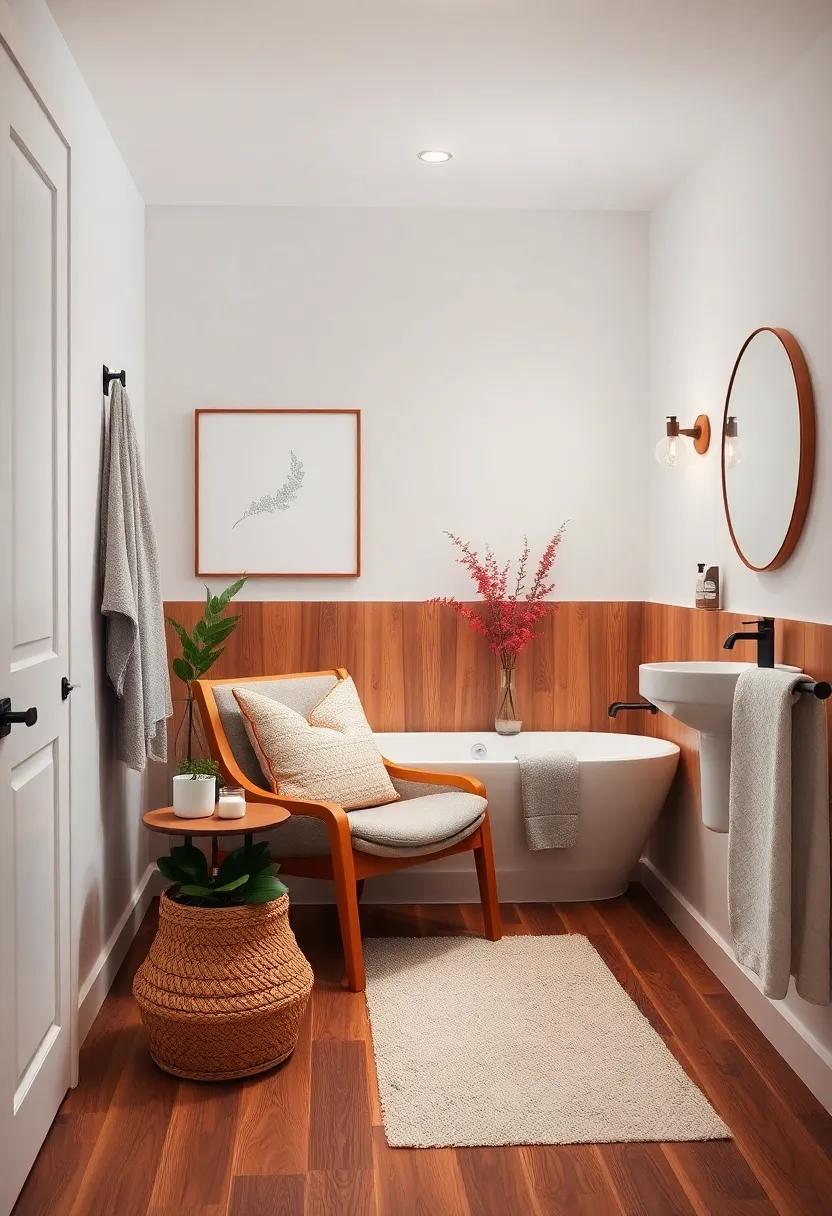
Create a serene retreat within your bathroom by establishing a chic reading nook that invites relaxation. Position a stylish armchair near a window or in a corner where natural light pours in, allowing you to soak up soothing rays as you delve into your favorite novel. opt for a chair with comfortable upholstery that complements your decor—think pastel hues or rich, earthy tones. A small, elegant side table beside the chair can hold your book, a cup of herbal tea, or even scented candles, enhancing the calming atmosphere.
Incorporate soft textiles to amplify the coziness of your nook. Layer a plush throw blanket over the chair and scatter some decorative pillows for added comfort. consider adding a small plant or a vase of fresh flowers on the side table,injecting a touch of nature into your space. Lighting is crucial; introduce a stylish lamp or wall sconce that casts a warm glow. with these thoughtful additions, your cozy corner will transform into an idyllic escape, allowing you to unwind and enjoy quiet moments in the privacy of your own oasis.
Reversible Bath Tray: Craft a charming bath tray for candles and bath products that can be flipped to coordinate with your decor style
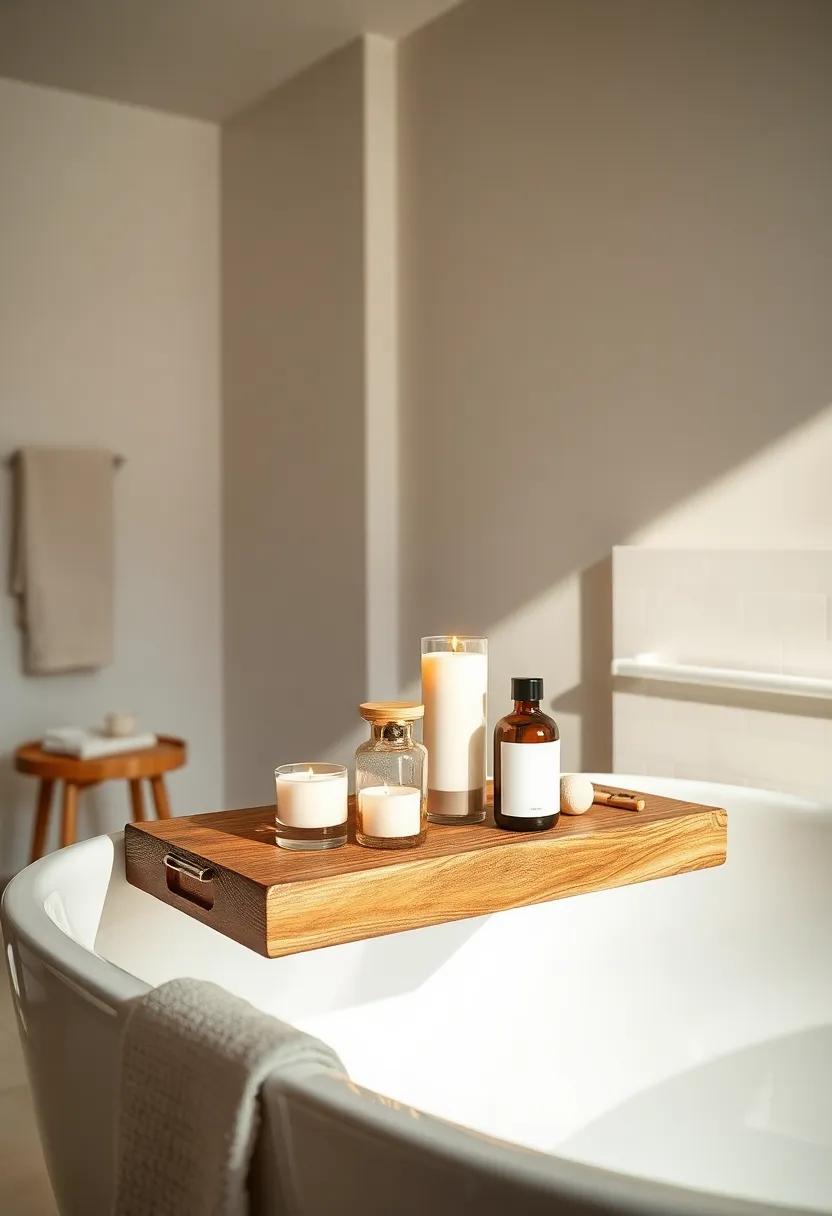
transform your bathroom into a serene sanctuary by crafting a reversible bath tray that effortlessly marries functionality with aesthetic appeal. Start by selecting a sturdy wooden board, ideally a piece that showcases natural grains. Sand it down and treat it with waterproof sealant to ensure durability against humidity. Once prepared, you can split the design by painting one side in a calming pastel—think soft mint or gentle lavender—while keeping the other side pristine white or a deep charcoal. This allows you to easily flip the tray to match your decor style,whether you’re going for minimalist elegance or cozy chic.
to elevate the visual charm of your new bath tray, consider arranging your favorite elements on top. Create a cozy candle corner by incorporating a mix of pillar candles and tealights on one side, complemented by small potted succulents or an aloe vera plant for added greenery. On the other side, display bath products like beautifully labeled soaps, bath bombs, and a delicate lotion, giving you an elegant yet functional setup. Experiment with varying heights by using cake stands or decorative boxes to add dimension. Remember, the beauty of a reversible tray lies in its versatility—switch it up seasonally or whenever the mood strikes!
Custom Shower Niche: Build a recessed niche in your shower wall for efficient storage of shampoos and soaps, keeping everything neat and accessible
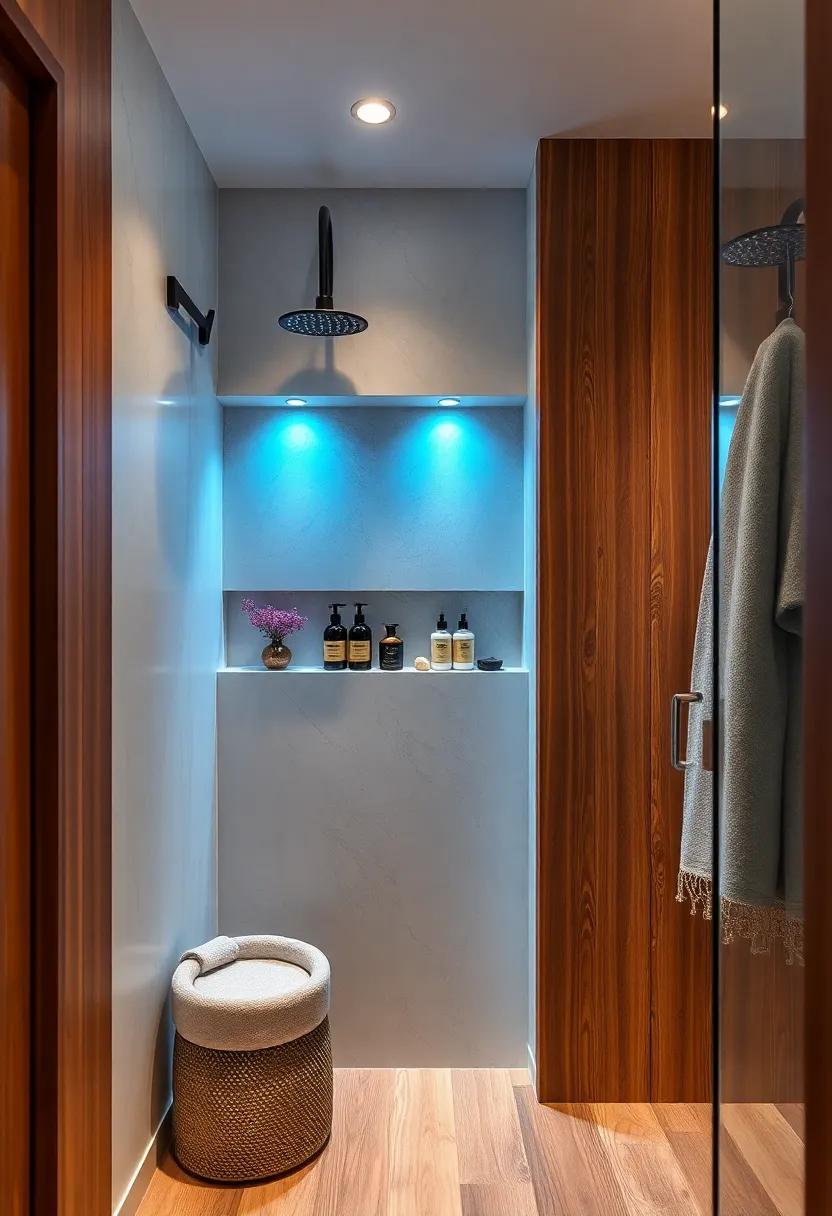
Create an organized and visually appealing shower experience by integrating a custom recessed niche into your shower wall. This clever design solution not only enhances the aesthetic of your bathroom but also provides a functional space to store your shower essentials. Imagine a sleek, tiled nook where your shampoos, conditioners, and soaps reside without cluttering the corners of your tub or blocking the flow of your daily routine. with a little planning, you can select the perfect spot for your niche, ensuring it’s easy to reach while blending seamlessly into your overall bathroom design.
When building your niche, consider these key elements to enhance usability and style:
- Size Matters: Determine a size that suits your storage needs while fitting well within your shower layout.
- Tile Selection: Use tiles that match or complement your shower walls to create a cohesive look.
- Positioning: Install the niche at a height that’s comfortable for everyone in your household.
- Additional Shelves: Add small shelves within the niche for extra organization—perfect for razors or small beauty products.
- Lighting: Consider installing a small LED strip to highlight the niche and make it easier to grab what you need.
Macramé plant Hangers: Hang plants in your bathroom with stylish macramé hangers that add texture and a bohemian flair to the space
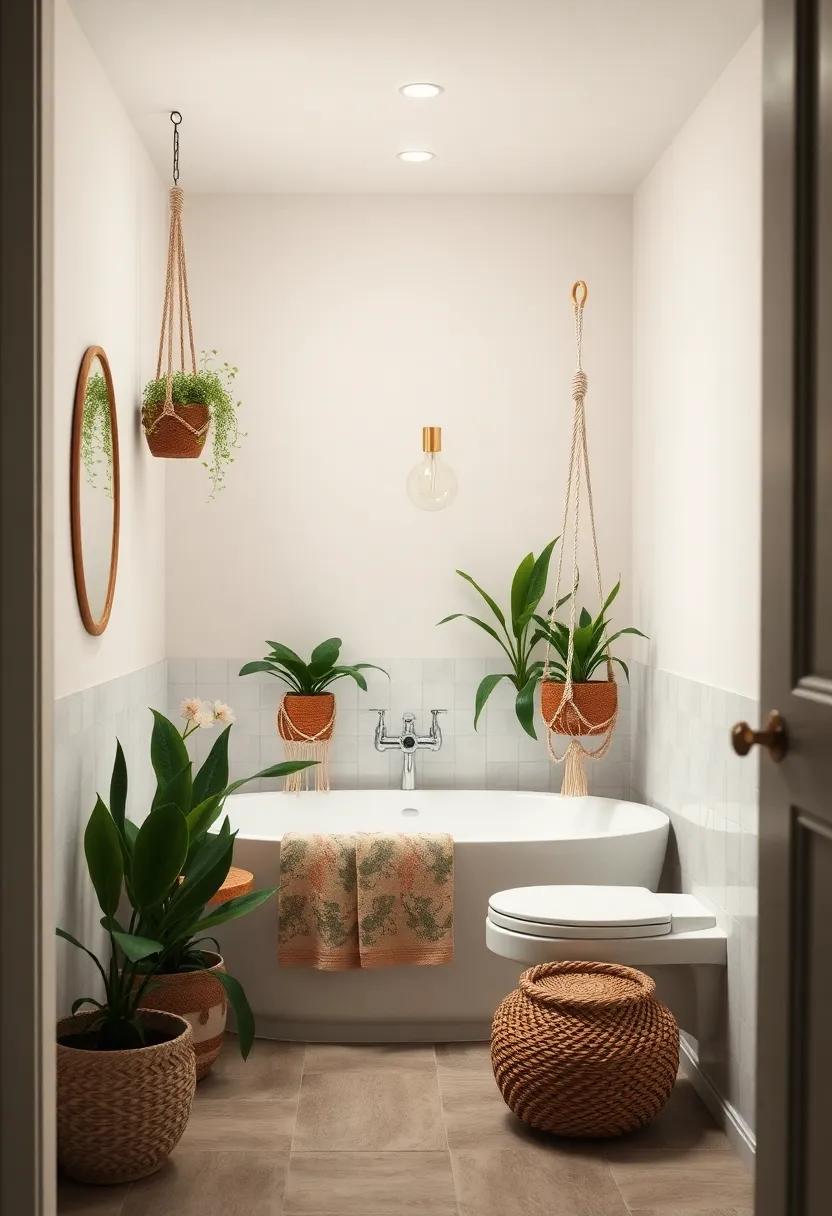
Transform your bathroom into a serene retreat with the charm of macramé plant hangers. These intricately woven hangers not only showcase your favorite greenery but also infuse your space with bohemian flair. by utilizing vertical space, macramé hangers create an inviting atmosphere that draws attention without compromising on floor space. incorporating plants like pothos,air plants,or fern varieties can elevate the aesthetic even further,while also improving your bathroom’s air quality.
For an added touch of style,consider mixing and matching different hangers along with varying pot sizes and colors. This versatility allows you to create a dynamic visual display that adds depth and warmth to your sanctuary. You can hang them near a window for optimal sunlight exposure or place them in corners to soften harsh lines and add texture. Pairing your macramé hangers with decor elements like woven baskets or natural wood accents enhances the overall look while reinforcing that tranquil, spa-like vibe.
Painted Floor Tiles: Transform plain grey bathroom tiles by painting them with durable outdoor paint for a bold and colorful upgrade
If your bathroom is stuck in a bland grey palette, painting your floor tiles can work wonders. Using durable outdoor paint designed for high moisture areas, you can introduce vibrant patterns and colors to your flooring. start by cleaning the tiles thoroughly to remove any grime, then tape off edges and surrounding surfaces to achieve clean lines. Once you’ve chosen your color scheme—perhaps a cheerful yellow and teal combination or a sophisticated black and white geometric design—apply several thin coats of paint for optimal coverage and longevity. This DIY project not only allows you to express your creative flair but also breathes new life into your otherwise dull bathroom.
To elevate the look even further, consider the following tips:
- stencils: Use stencils to create intricate designs and add visual interest.
- Sealing: After your paint has dried, seal it with a clear, waterproof coat for added protection against moisture.
- Contrast: Pair your new colorful tiles with matching or contrasting accessories such as towels or rugs for a cohesive look.
Here’s a quick guide to choosing your color palette:
| Color | Vibe | Best For |
|---|---|---|
| Bright Yellow | Cheerful & Inviting | Small spaces needing warmth |
| cool Teal | Relaxing & Refreshing | Modern, beachy bathrooms |
| Sleek Black | Elegant & Chic | Minimalist designs |
| Warm Coral | Inviting & Cozy | Brightening neutral palettes |
Bamboo Bath Caddy: Create a simple bamboo caddy to hold your book, wine glass, and bath essentials for the ultimate spa experience

Your Essential Spa Companion
Transform your bathroom into a serene getaway with a handcrafted bamboo caddy that seamlessly blends style and functionality. This stunning piece will not only elevate your bath experience but also serve as an organized storage solution for your favorite essentials.Imagine soaking in warm water while having easy access to everything you need—it’s like having a spa at home! Use natural bamboo, known for its durability and water resistance, to create a clean and elegant caddy that fits perfectly across your bathtub.
To make your bath caddy truly personal, consider integrating specific features that cater to your personal style and needs. Here’s a list of items you might include:
- Book or E-reader Holder: A slotted section to securely hold your current read, allowing you to unwind without interruptions.
- Wine Glass Stand: An elegantly designed space that keeps your favorite wine close without the worry of spills.
- Storage for Bath Essentials: Small compartments to hold candles, essential oils, or bath salts for a touch of tranquility.
creating a bamboo caddy is straightforward, but you can also paint or stain it to match your bathroom décor.Here’s a simple table to guide your measurements:
| Dimension | Measurement |
|---|---|
| Length | 30 inches |
| Width | 8 inches |
| Height | 3 inches |
With just a bit of creativity and effort, you can craft a functional piece that not only enhances your relaxation time but also adds a touch of natural beauty to your personal oasis. So gather your materials and bring your spa ideals to life with a bamboo bath caddy that is both practical and chic!
Warm Lighting Fixtures: Swap out harsh lights with warm-toned LED bulbs and stylish fixtures to create a calming atmosphere in the bathroom
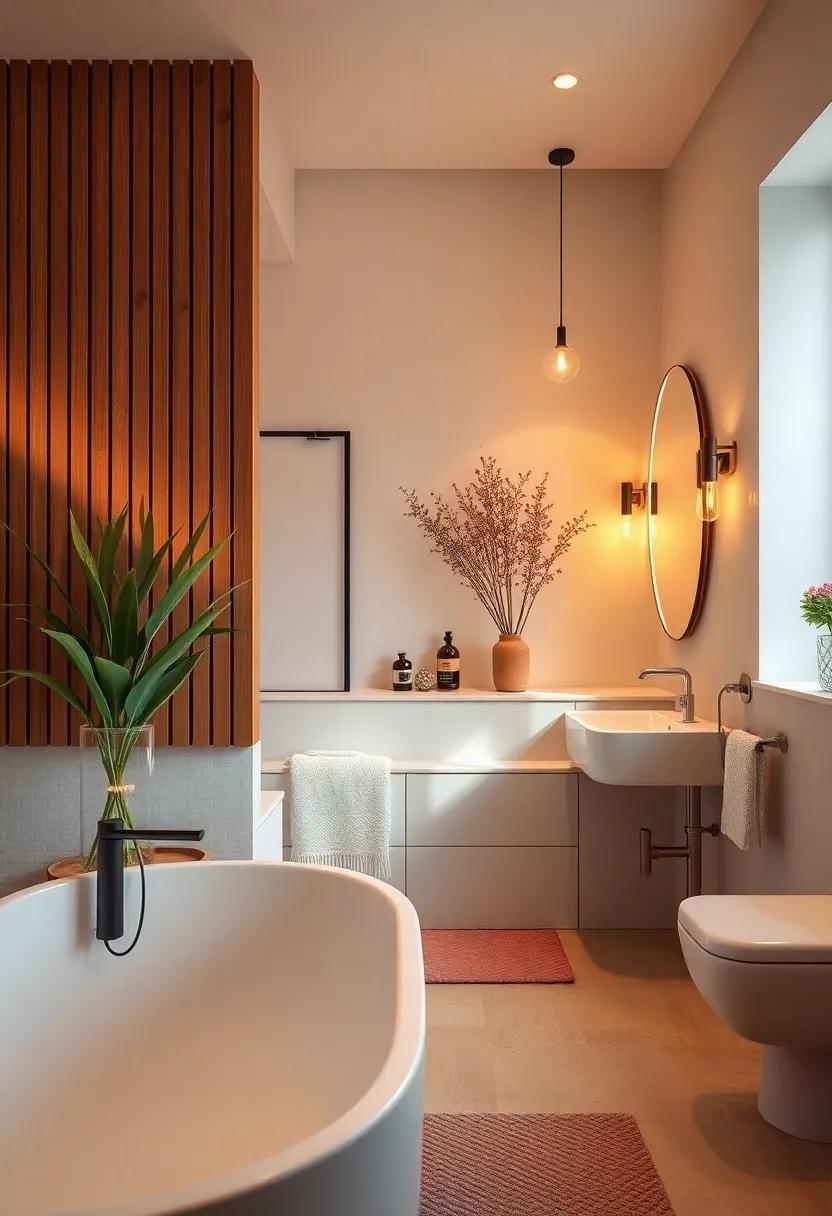
Transform the mood of your bathroom by replacing harsh lighting with warm-toned LED bulbs that not only save energy but also provide a soothing glow. The right lighting fixtures can make all the difference, turning your space into a serene retreat. Consider exploring options such as:
- Wall sconces that frame mirrors with gentle illumination
- Pendant lights that add a touch of elegance and style
- Recessed lighting for a sleek, modern look that enhances warmth
- Decorative chandeliers to create a focal point while softening the light
Along with choosing the right bulbs and fixtures, experiment with lighting placement to maximize ambiance. Install fixtures at different heights and angles to highlight architectural features, or create a layered lighting effect that blends functional brightness with cozy warmth. To help you visualize your options, here’s a simple table comparing different warm lighting styles:
| Fixture Type | Best For | Style Impact |
|---|---|---|
| Wall Sconces | Mirror Lighting | Elegant and Soft |
| Pendant lights | Over Vanities | Chic and Stylish |
| Recessed Lighting | General Illumination | Modern and Subtle |
DIY Textile Wall Hanging: Weave a colorful textile wall hanging to add warmth and texture to an otherwise sterile bathroom environment
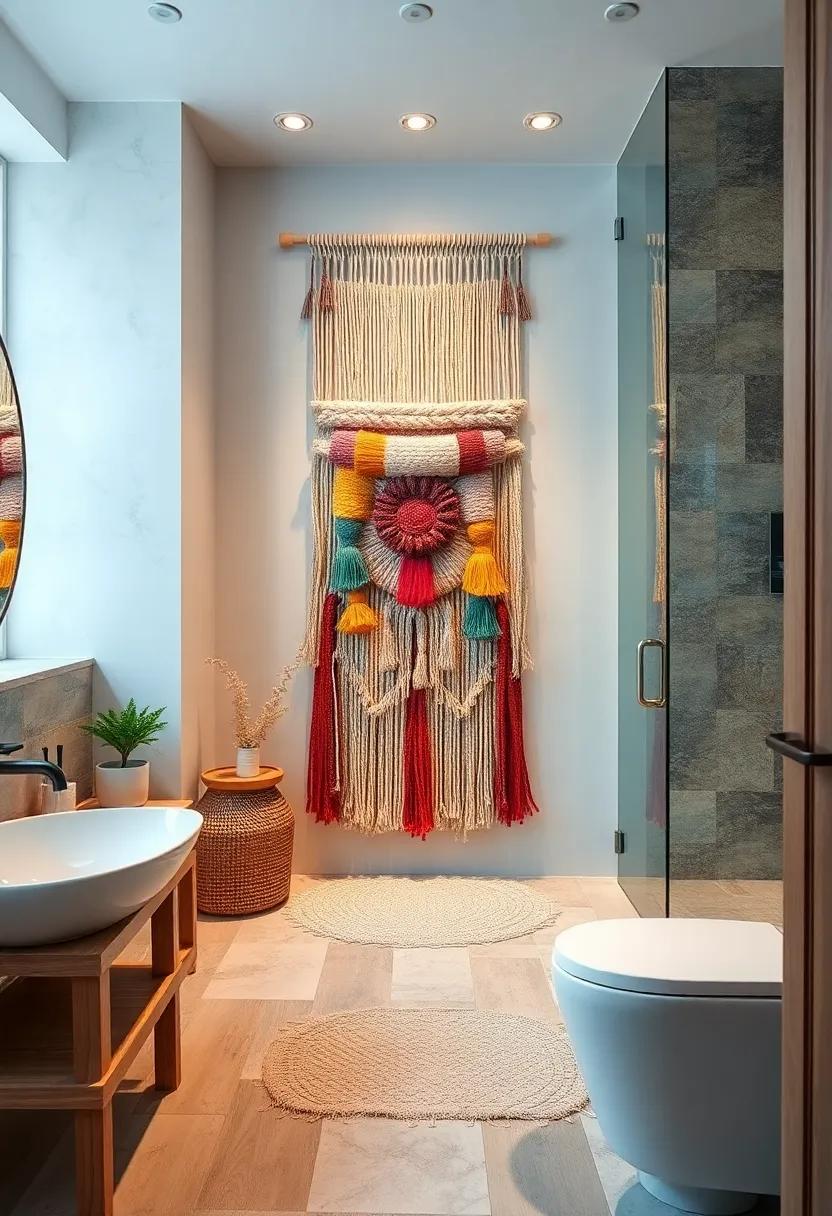
Elevate the ambiance of your bathroom with a stunning textile wall hanging that serves as both a statement piece and a source of cozy warmth. Choosing a color palette that complements your bathroom decor can transform the space into a vibrant retreat. Consider using materials like cotton, wool, or even recycled fabrics to create layers and textures that soften the sterile feel of tiled walls. You can opt for a simple loom or even a DIY cardboard loom to weave your design, allowing for endless creativity in how you combine colors and patterns.
Here’s a quick guide to help you with your weaving project:
| Step | Description |
|---|---|
| 1. Gather Materials | Choose yarn or fabric strips in your desired colors, scissors, a loom, and a dowel for hanging. |
| 2. Set Up Your Loom | Secure your warp threads tightly on your loom, ensuring a steady base for weaving. |
| 3. Start Weaving | Wrap yarn over and under the warp threads,incorporating various techniques like knotting and looping for dimension. |
| 4. Finish and Hang | Tie off the ends securely, trim excess yarn, and attach your textile piece to a dowel for easy hanging. |
Experiment with various textures by incorporating fringes or tassels for added flair and visual interest. This DIY project not only enhances the aesthetics of your bathroom but also offers a tactile element that invites warmth and creativity into your daily routine. Personalized touches like adding your favorite colors or meaningful motifs can make the wall hanging uniquely yours, turning any bathroom into a chic personal oasis.
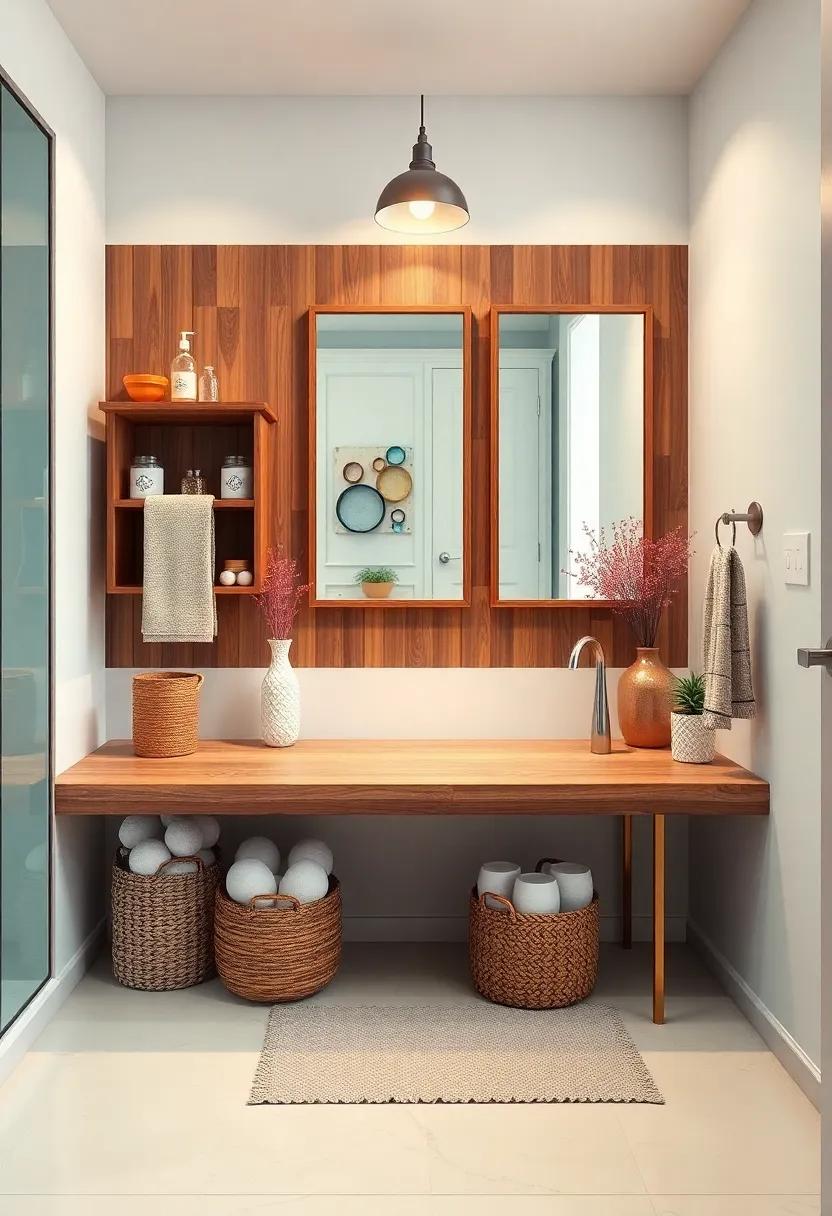
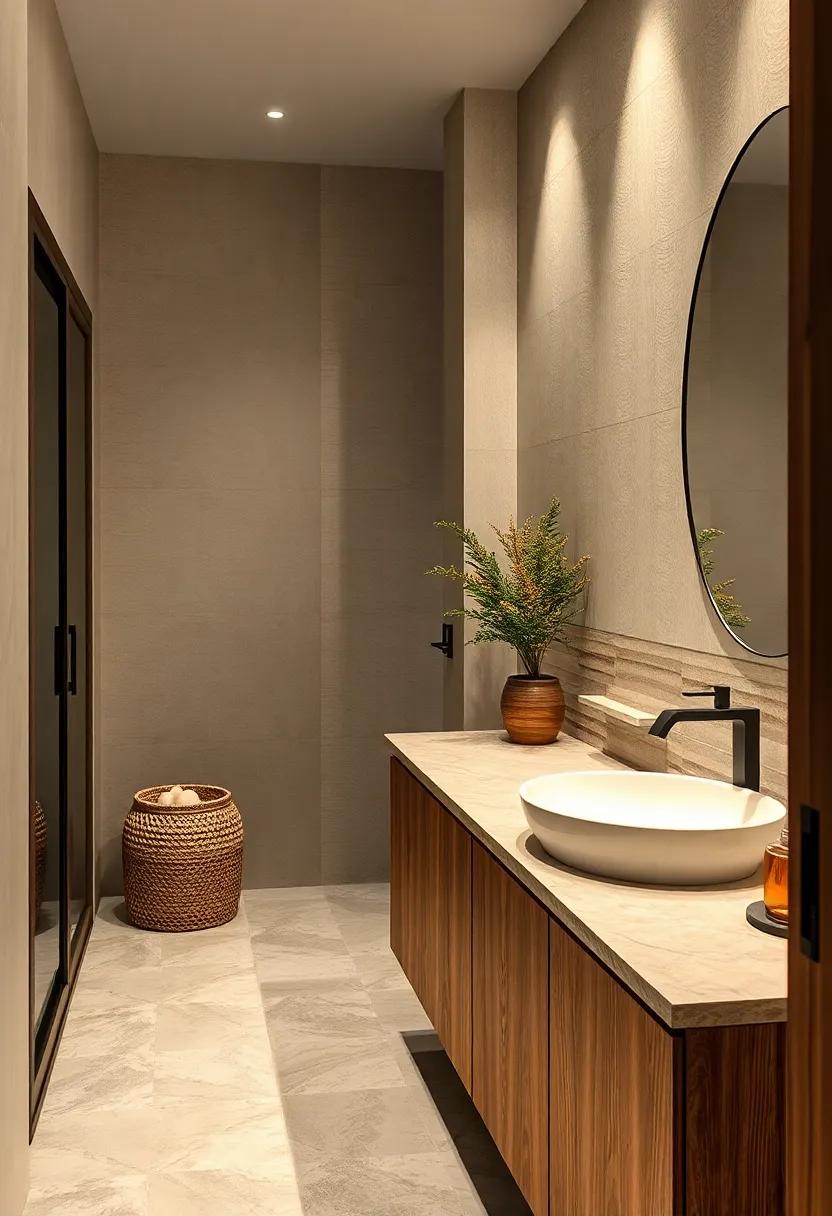
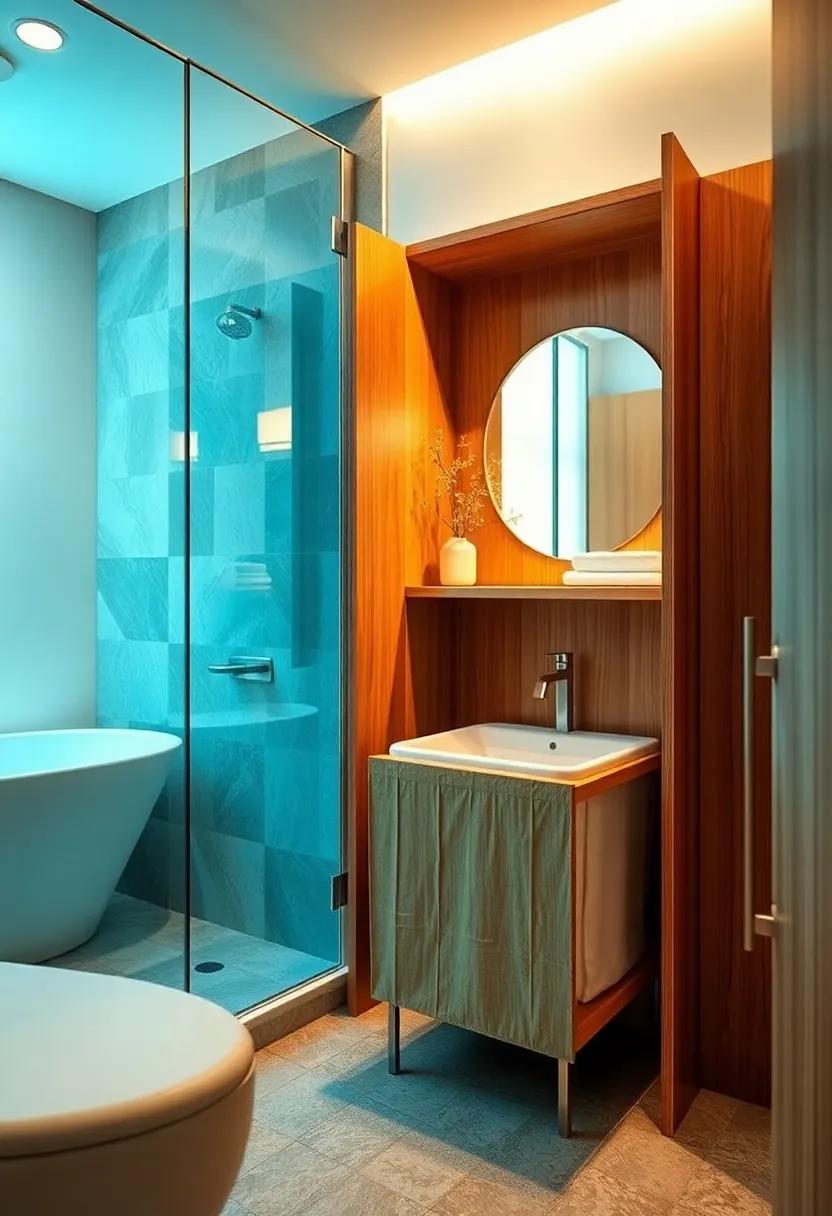
Upcycled Furniture Vanities: Refurbish an old dresser or nightstand into a unique bathroom vanity, combining function and style with a personal touch

Transforming an old dresser or nightstand into a stunning bathroom vanity can breathe new life into your space while offering a distinctive touch that reflects your personality. Begin by selecting a sturdy piece of furniture that can withstand the humidity of a bathroom. Refinish the surface with a moisture-resistant paint or stain to ensure longevity. Consider adding a vessel sink on top for a modern twist, or choose a classic under-mount sink for a seamless look. don’t skimp on the details—dress up your vanity with stylish hardware, and maybe even consider using decorative trim to enhance its character.
To maximize space and function, focus on clever storage solutions. You can repurpose the drawers by installing a slide-out shelf to store toiletries or towels efficiently. If the existing drawer layout doesn’t fit your needs, you can easily customize the interior to create small compartments or open shelves. Consider incorporating a mirror that complements your vanity design, as this will enhance the overall aesthetics and make your bathroom feel more spacious. Below is a simple visual guide to help you through the transformation process:
| Task | supplies needed |
|---|---|
| Remove Hardware | Screwdriver |
| Sand Surface | Sanding Block or Electric Sander |
| Paint/Refinish | Moisture-Resistant Paint or Stain |
| Install Sink | Sink, Plumbing Kit |
| Add Mirrors | Mirror, Mounting Hardware |
Whimsical Wall Decals: Use removable wall decals to add playful patterns or designs in your bathroom without the commitment of paint
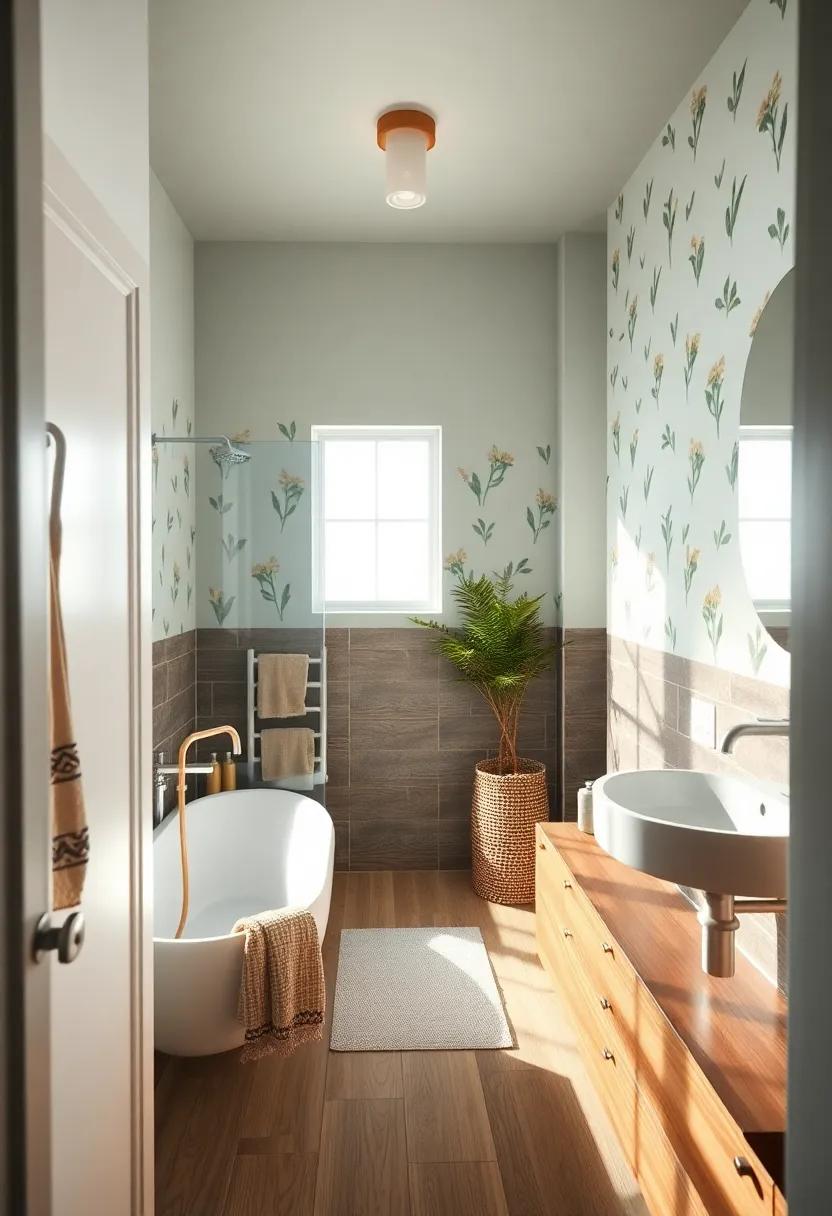
Revamping your bathroom doesn’t have to involve a complete renovation. With the magic of removable wall decals, you can effortlessly inject personality into your space, making it feel fresh and inviting. Imagine vibrant flowers, whimsical animals, or intricate geometric patterns dancing across your walls, instantly elevating your morning routine with their playful charm. The best part? These decals peel off easily, allowing you to switch up the design whenever the mood strikes or the trend changes.
To get started, consider these fun ideas for submission:
- Accent Wall: choose one wall to serve as a focal point where you can play with larger decals or an elaborate design.
- Border Designs: Create a playful border around the vanity or mirror area with smaller decals to make the space pop.
- Themed Décor: Complete a nautical or botanical theme with matching decals like waves or leaves that complement your bathroom accessories.
Before purchasing, keep these handy tips in mind:
| tip | Details |
|---|---|
| Material | Opt for vinyl decals for easy application and removal. |
| Size | Measure your wall space to ensure the decals fit perfectly. |
| Style | Choose colors and patterns that complement your existing décor. |
Handcrafted Bath Bombs: Make and package your own bath bombs or bath salts for a luxurious soak, presenting them beautifully for display
transform your bathing ritual into a luxurious experience by making your own handcrafted bath bombs or bath salts.Start by gathering your ingredients, which typically include baking soda, citric acid, Epsom salt, and essential oils for that delightful fragrance. Choose colors that soothe you—think soft pastels or vibrant hues—and use silicone molds to shape your creations into fun designs like hearts,stars,or even seasonal shapes.Here’s a simple recipe to get started:
- 1 cup baking soda
- 1/2 cup citric acid
- 1/2 cup Epsom salt
- 1 tsp essential oil (your favorite scent)
- Food coloring (optional)
- Water (spritz lightly)
Once you’ve mixed your ingredients and shaped your bath bombs, it’s time to focus on presentation. Package your creations in decorative boxes or cellophane bags, and adorn them with ribbons or dried flowers. Include a handwritten note with soaking instructions for an added personal touch.For a delightful display, consider creating a small basket filled with your bath essentials, showcasing your bath bombs or salts alongside plush towels and scented candles. This not only elevates your bathroom decor but also adds a touch of elegance that invites relaxation.
| Ingredient | Function |
|---|---|
| Baking Soda | Creates fizz and softens water |
| Citric Acid | Causes the fizzing reaction |
| Epsom Salt | Relaxing for sore muscles |
| Essential Oils | Add fragrance and therapeutic properties |
Cleverly Hidden laundry Hamper: Design a pull-out laundry hamper from a cabinet to keep your bathroom tidy and free from clutter
Transform your cluttered bathroom into a serene retreat by incorporating a cleverly hidden laundry solution. By designing a pull-out laundry hamper within a cabinet, you can maintain a pristine appearance while ensuring that dirty clothes are conveniently corralled. Start by selecting a cabinet that complements your bathroom’s décor, and opt for soft-close drawers to maintain a sleek operation. Make sure to include a woven or fabric liner to add an element of texture and keep your laundry hidden under wraps. This thoughtful design not only conceals mess but also seamlessly blends into your bathroom aesthetics.
To build your own pull-out hamper, gather some simple materials, including wood or MDF for the frame, drawer slides, and canvas or mesh bins to keep clothes organized. Follow these essential steps:
- Measure your space and select the right cabinet.
- construct the frame, making sure it fits snugly in the cabinet.
- Install drawer slides to allow for easy pull-out access.
- Attach the bins to the inner frame, ensuring they can be easily removed for laundry day.
with this design, you not only maintain the elegance of your bathroom but also introduce a new level of functionality. Your laundry area can now remain out of sight, creating a calm, clutter-free environment perfect for self-care and relaxation.
Vintage Accent Pieces: Hunt for vintage finds at flea markets to incorporate unique decor items that tell a story and showcase your personality
Flea markets are treasure troves of unique finds just waiting to be discovered. As you wander through rows of vendors hawking their wares, keep an eye out for vintage accent pieces that can transform your bathroom into a curated sanctuary. Consider items like retro mirrors, which can add depth and a touch of glamour, or delightful ceramic planters that bring a splash of color and life to your space. Antique storage solutions, such as quirky wooden crates or ornate tins, can seamlessly blend functionality with charm, helping to keep your bathroom organized and stylish.
Don’t shy away from larger furniture pieces that speak to your aesthetic—think vintage benches for added seating or a charming stool that doubles as a decor accent. These finds are not just decor; they possess stories from the past that can spark conversations and provide a unique focal point. To help inspire your search, here’s a simple table of ideas for your vintage hunt:
| Item | Style Influence | Potential Use |
|---|---|---|
| Vintage Vase | Bohemian | Holding fresh blooms or as a standalone piece |
| Antique rack | Industrial | Displaying towels or toiletries |
| Retro Wall Art | Mid-Century Modern | Brightening up bare walls |
| Old Trunk | Rustic | Storage for linens or seasonal items |
Closing Remarks
As we wrap up this tour through 29 innovative DIY bathroom decor ideas, we hope you’ve gathered a wealth of inspiration to transform your space into a true personal oasis. Whether you’re drawn to calming colors, unique textures, or quirky accessories, remember that the beauty of DIY lies in the personal touch you imbue in every project.
These ideas serve not just as a guide, but as a springboard for your own creativity. Embrace the process, experiment with different designs, and don’t shy away from making mistakes—they frequently enough lead to the most delightful discoveries. With just a bit of effort, your bathroom can become a serene sanctuary that reflects your style and comforts the soul.So roll up those sleeves, gather your materials, and let the transformation begin! Happy crafting!